If you have a scenario where Azure Logic apps needs to access AWS API Gateway endpoint using API key then this tutorial will show you how to set up your API with AWS API Gateway, create and configure API key and usage plan to secure your API endpoints, test the setup using POSTMAN and then access it using Azure Logic App.
Steps:
1. Follow this article to Import and deploy an API using AWS API Gateway.
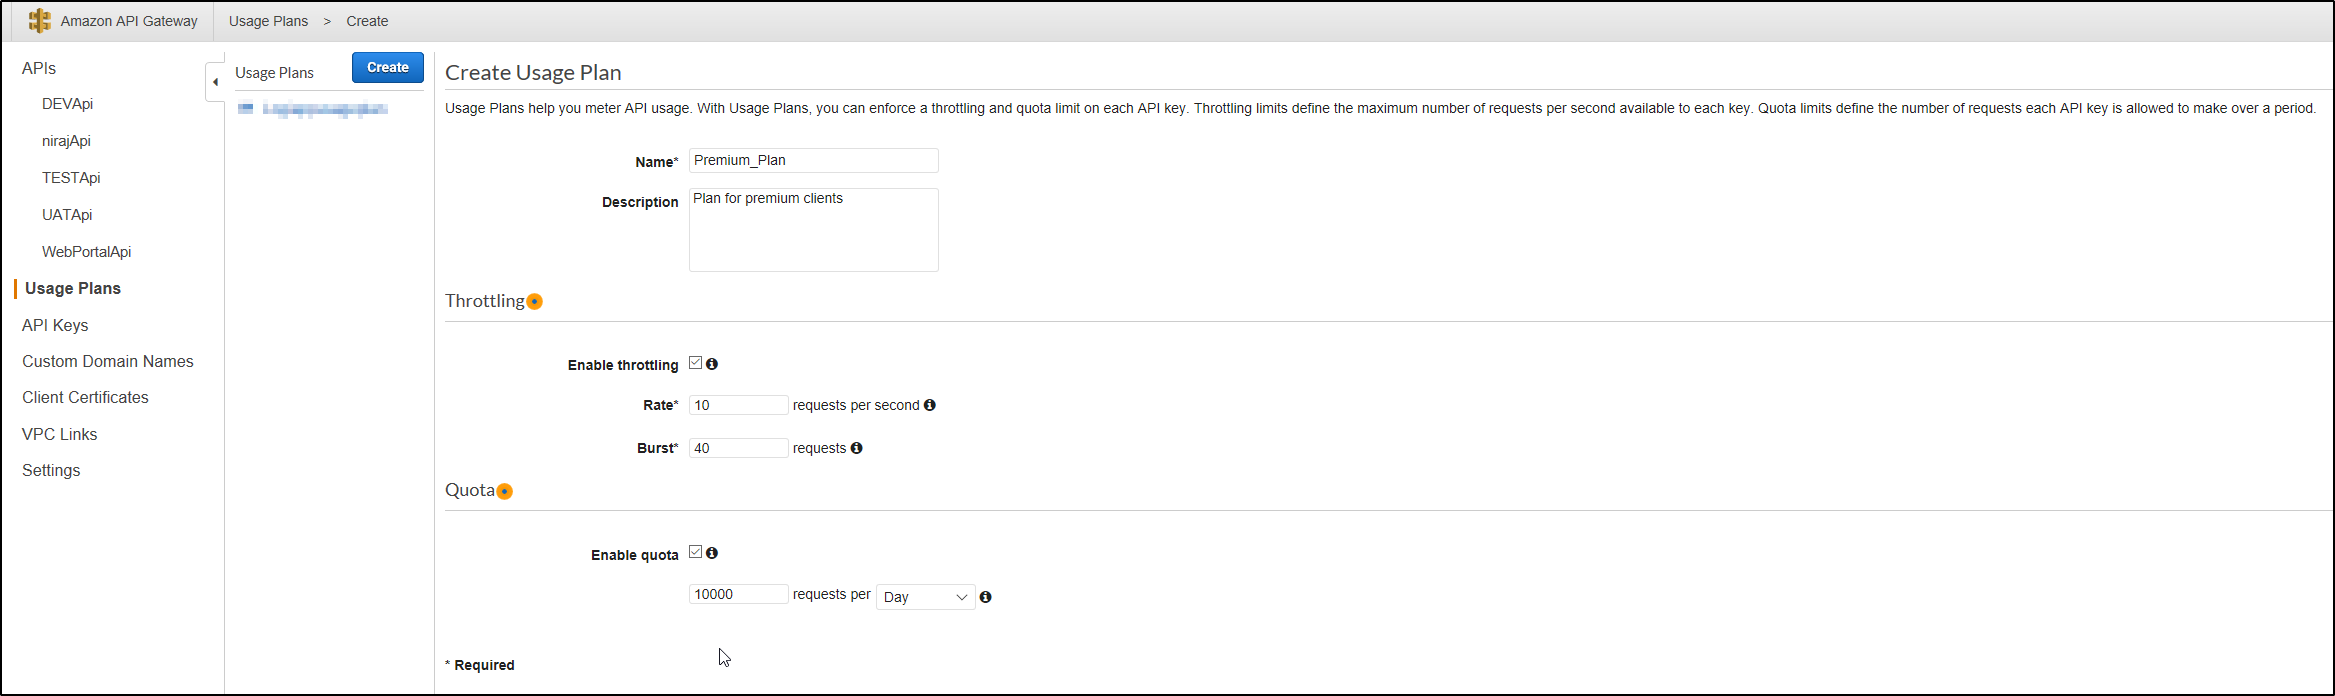
2. Create and Configure API Key: After creating your API in API Gateway, you can create API key and Usage Plans. Open API Gateway console and navigate to Usage Plans and click Create.
> Provide an Name, Description and Set throttling and Quota limits.
>> Click Next and Add API Stage and click the tick mark icon on right to Save, then click Next

>>Add API Key to Usage Plan, you can create API Key or add existing Key to the plan. We will create new API Key to attach with the plan.
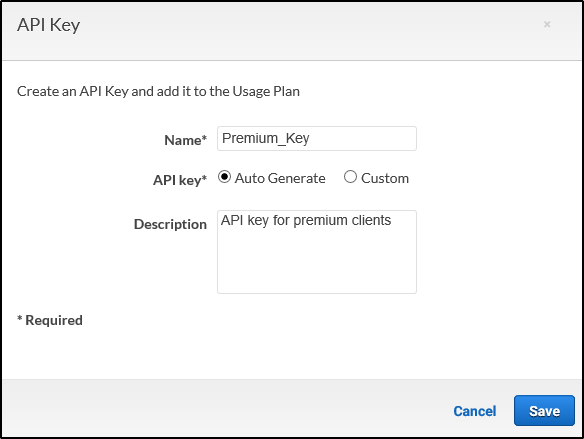 >> After adding details for the API Key, click Save. It will revert to the below page, click Done.

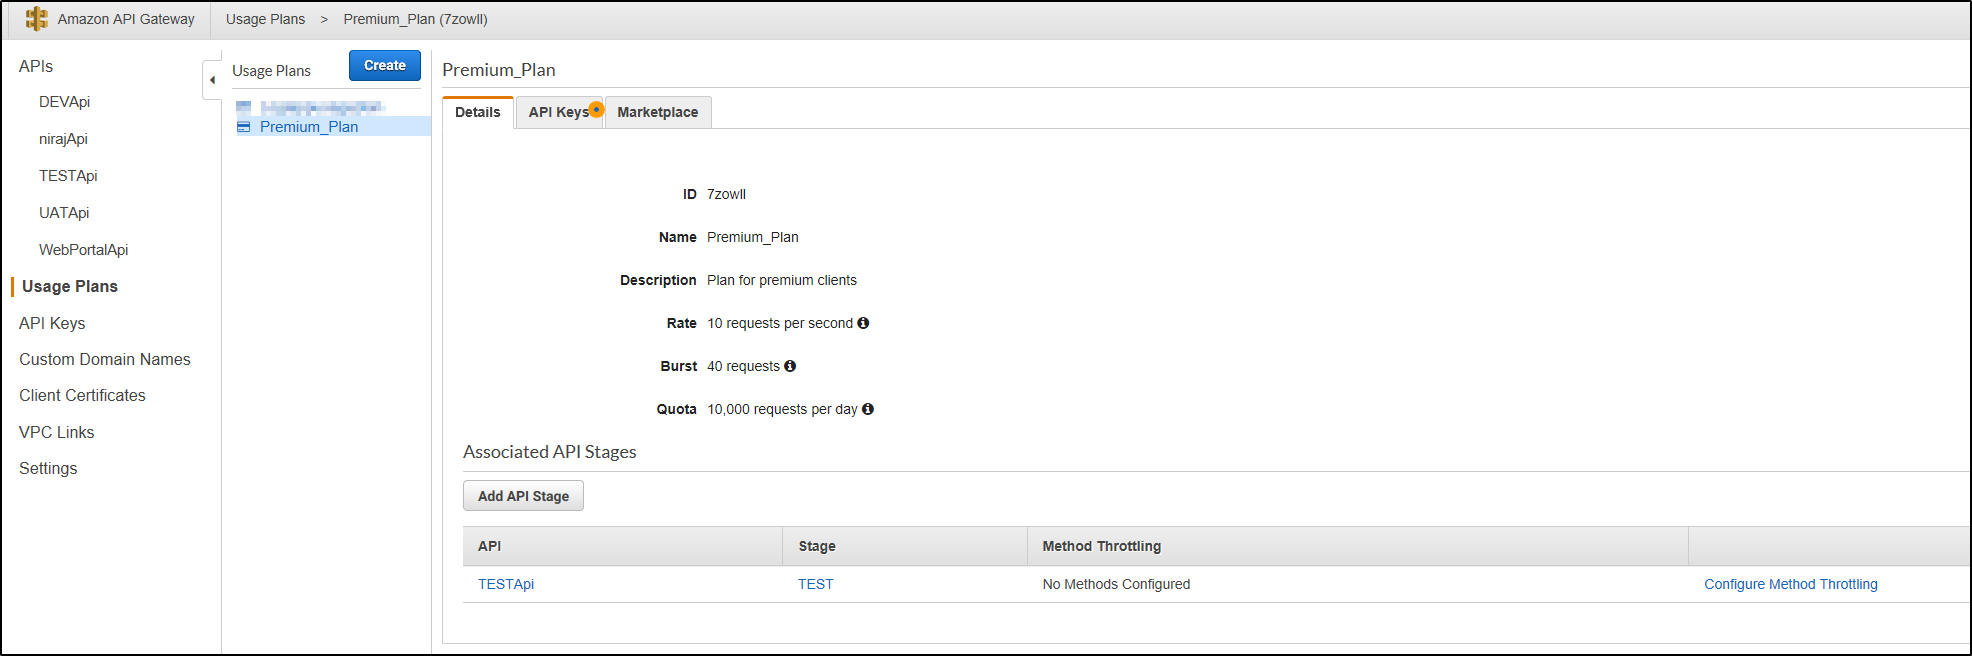
>> Final Usage Plan will show up –
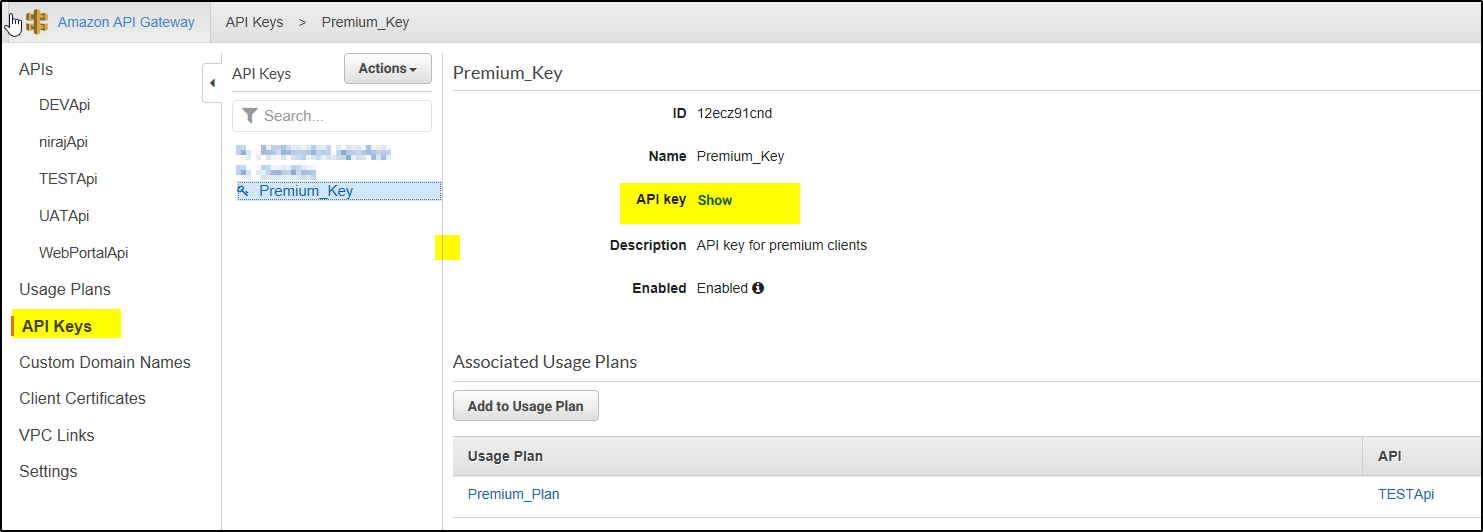
>>On API Gateway console, click on API Keys to view the created API key, then click SHOW to see the key value (copy it for later use) –
>>Now go to API Gateway console, click PetStore API–> /pets –>Get–>click Method Request.
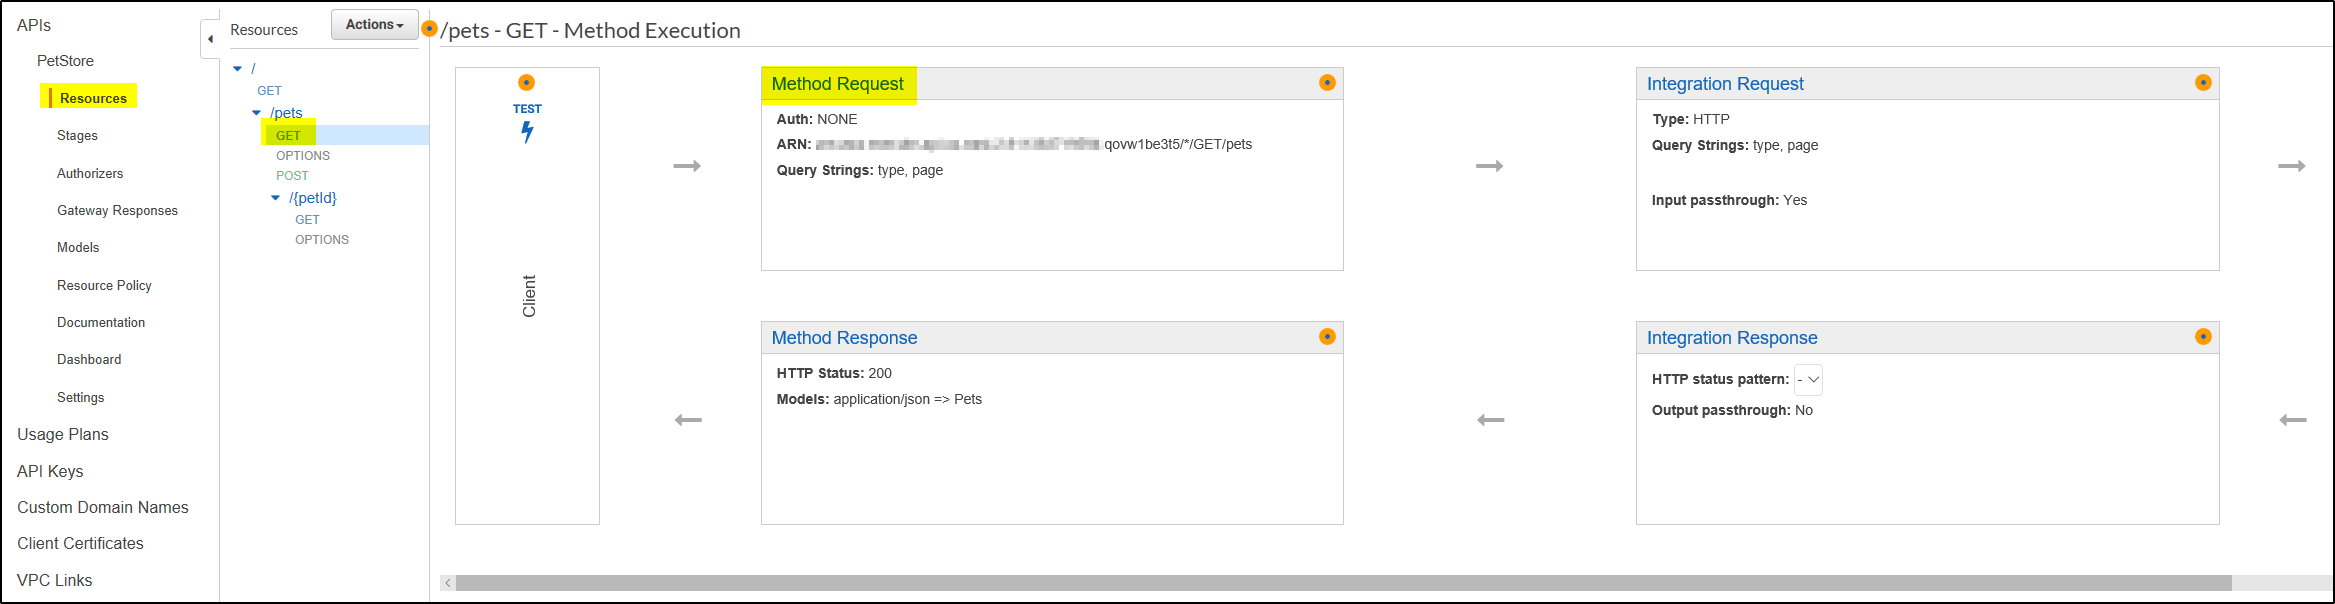
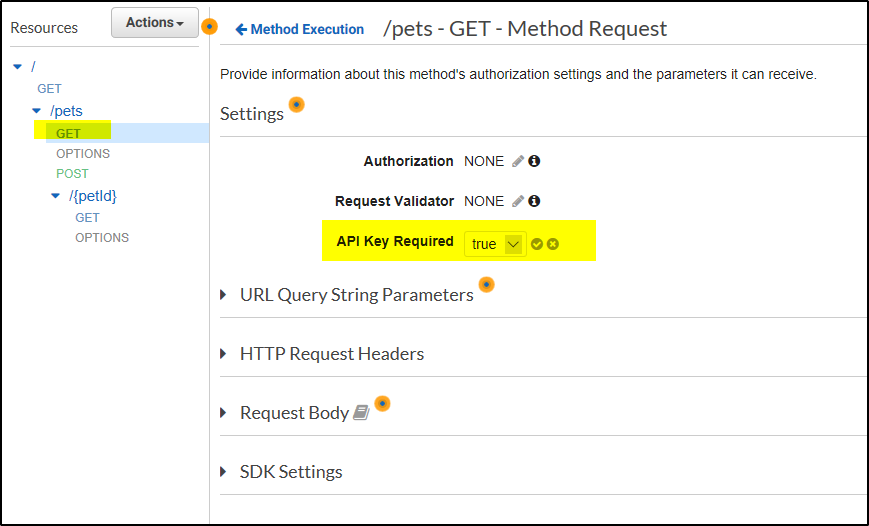
>>Under settings, set “API Key Required” as True and Save. Deploy the API to Test stage again.
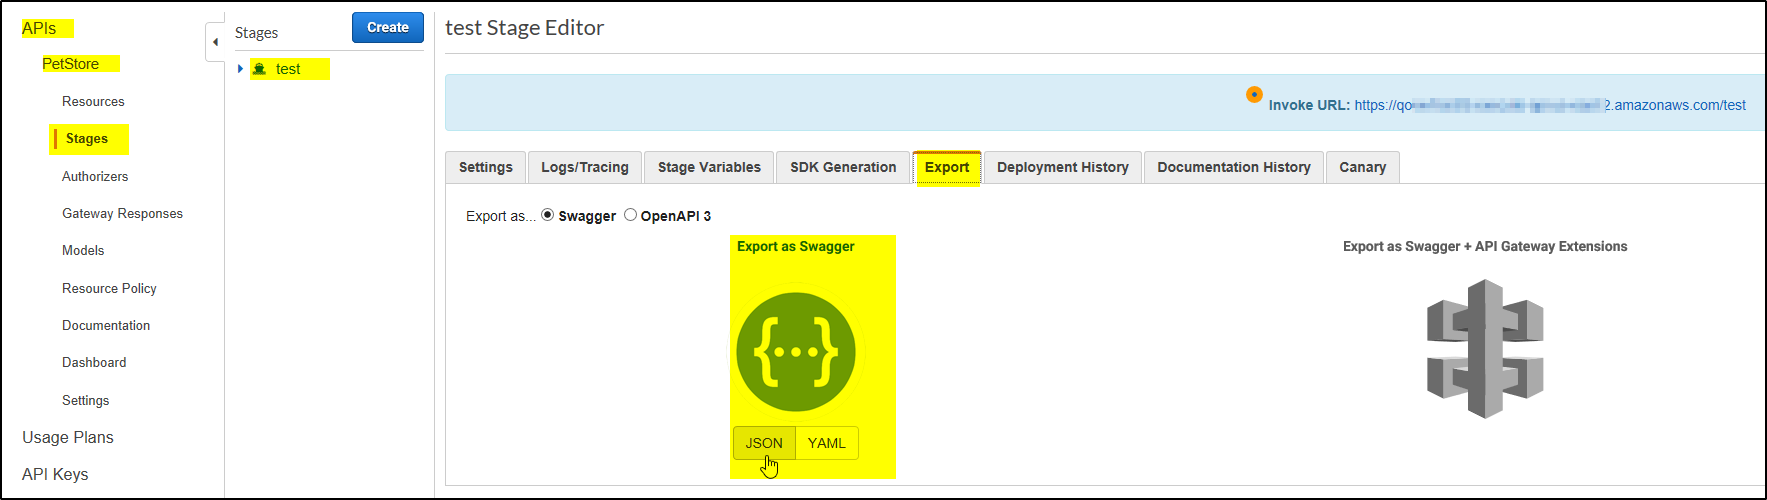
>>Now go to APIs–>Petstore–>Stages, click on Test stage. Then click on Export Tab and then Export as Swagger. Save the content in petstore_swagger.json file which will be used to access this API using Azure Logic App.
3. Test the accessibility of the API using POSTMAN:
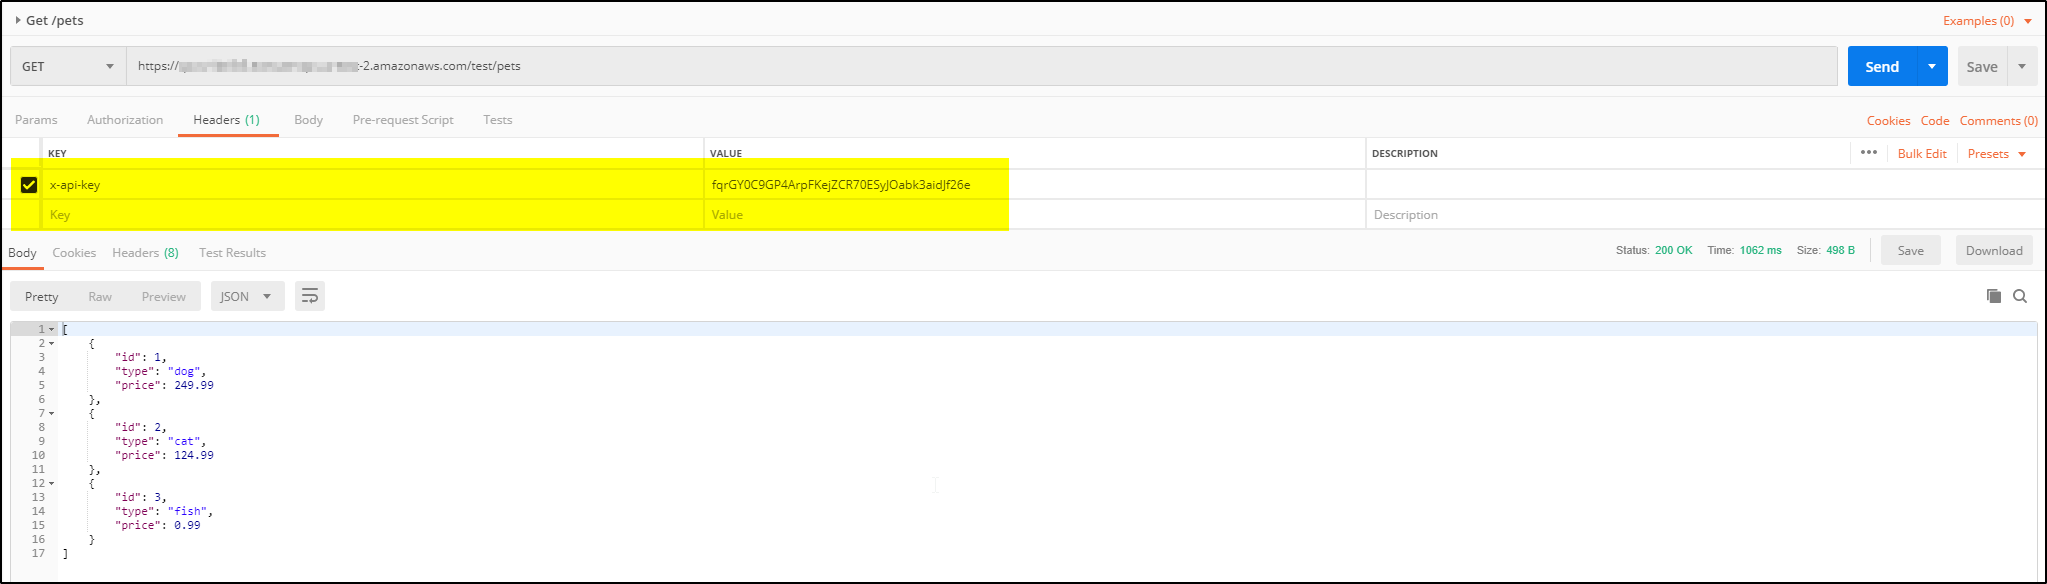
>>Open Postman and try to access the API suing the API Key as shown below. If you don’t pass API key in x-api-key header then the method can’t be accessed-
4. Access the API endpoint in Azure Logic App:
>> To access the AWS API endpoint from Azure, you have to add a Logic Apps Custom Connector. Login to Azure portal
>>Search for Logic Apps Custom Connector

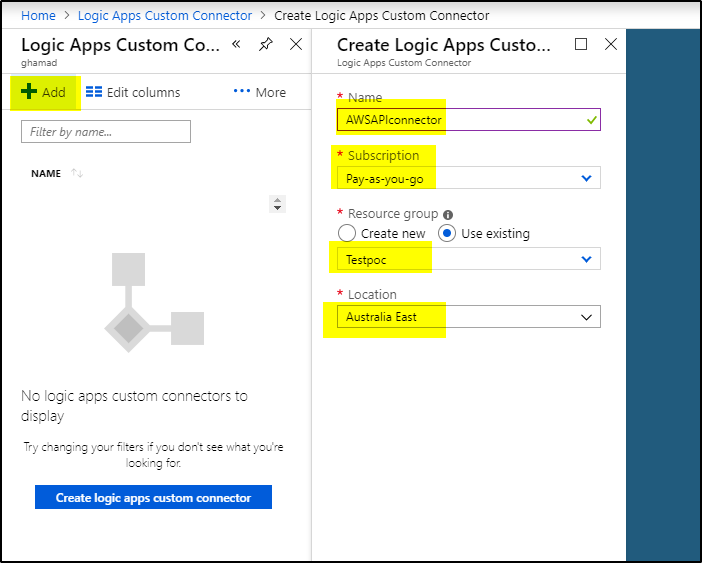
>>Click Add, provide Name, Subscription, Resource Group and Location, click Create
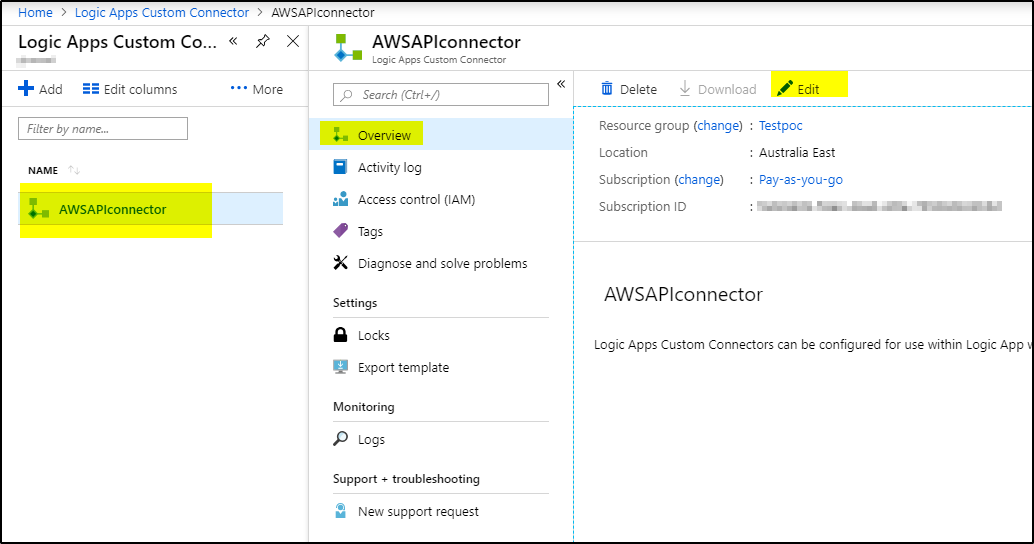
>>Once connector is created, select and Edit to configure it
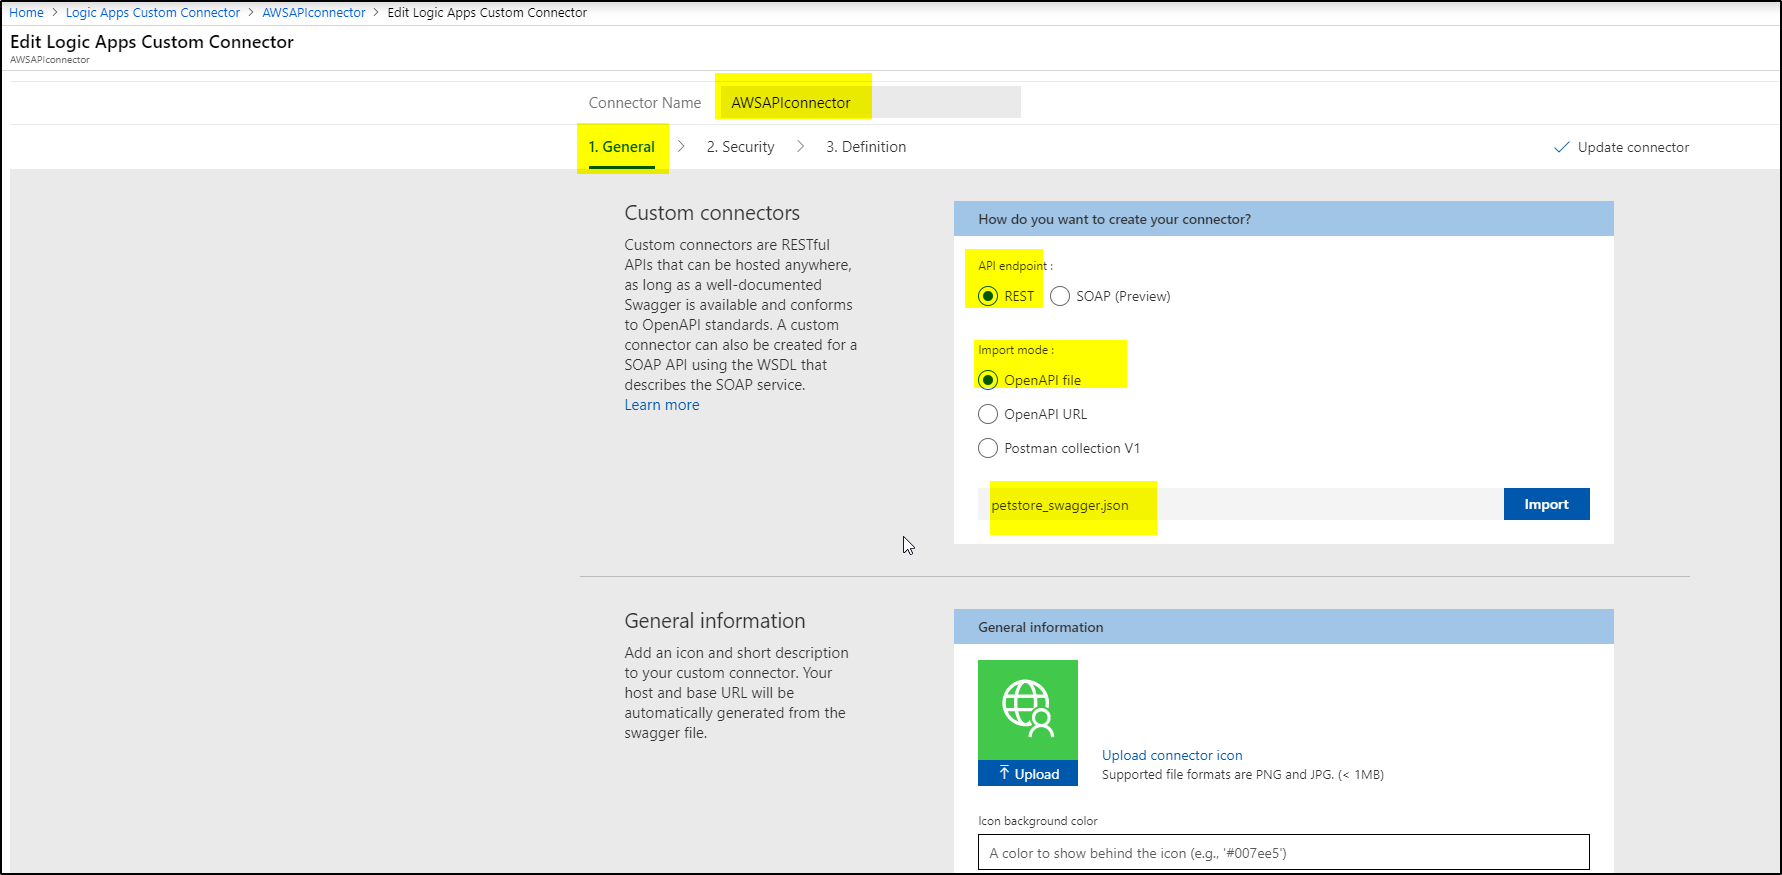
>>On the General screen, select REST API endpoint and import mode as OpenAPI File and click Import to select the petstore_swagger.JSON file which we saved earlier.
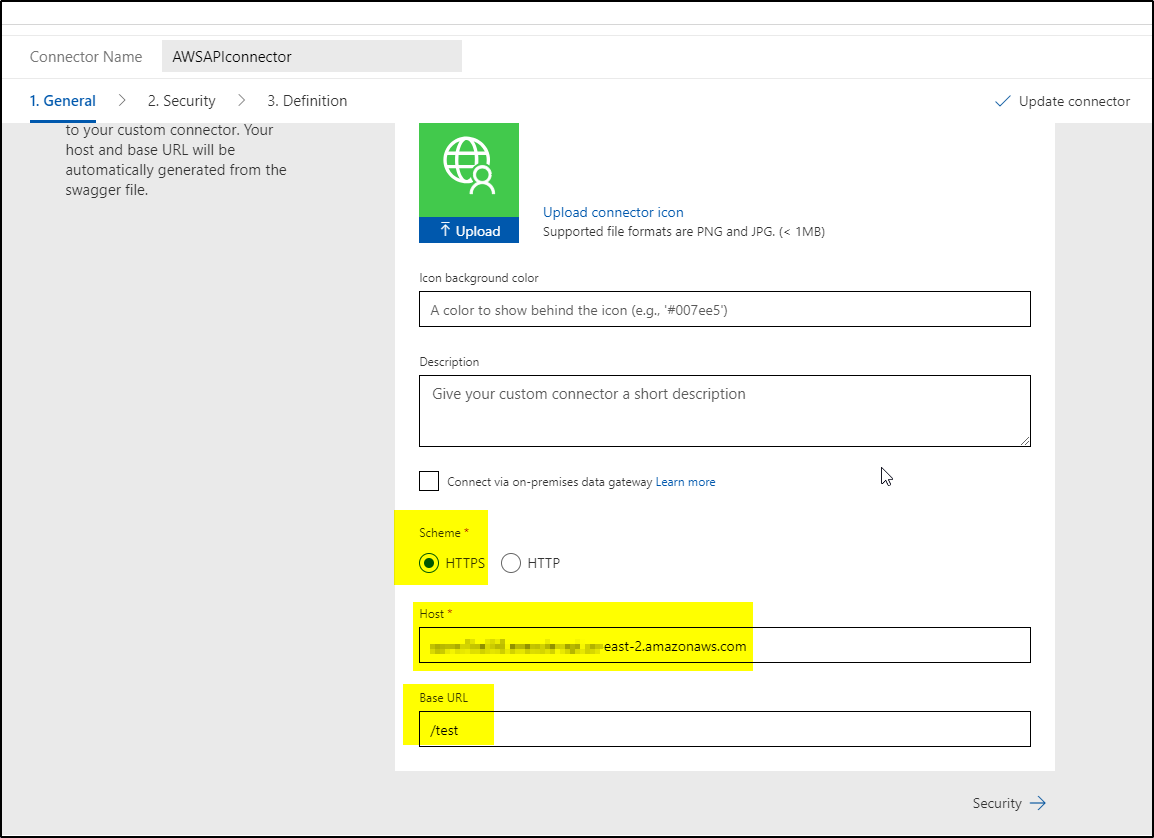
>>Scroll down on same page to see the Scheme, Host and base URL automatically filled in based on JSON file
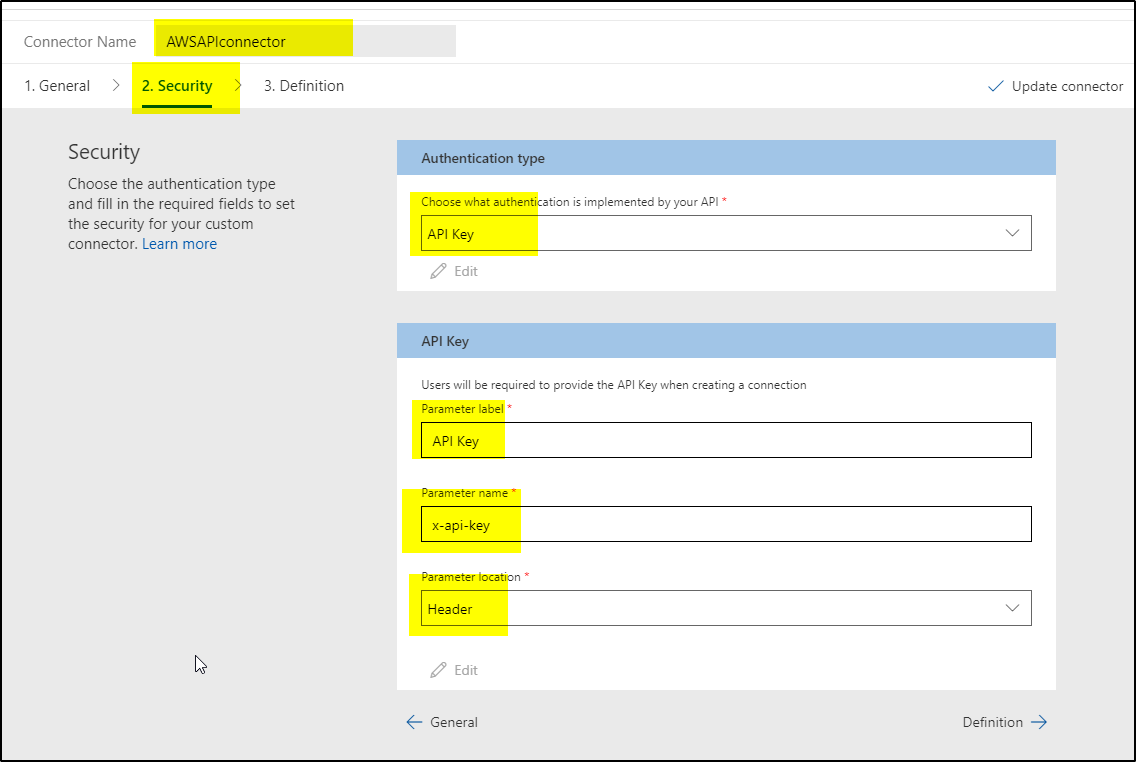
>>Click on Security and provide the information as shown in below screen-
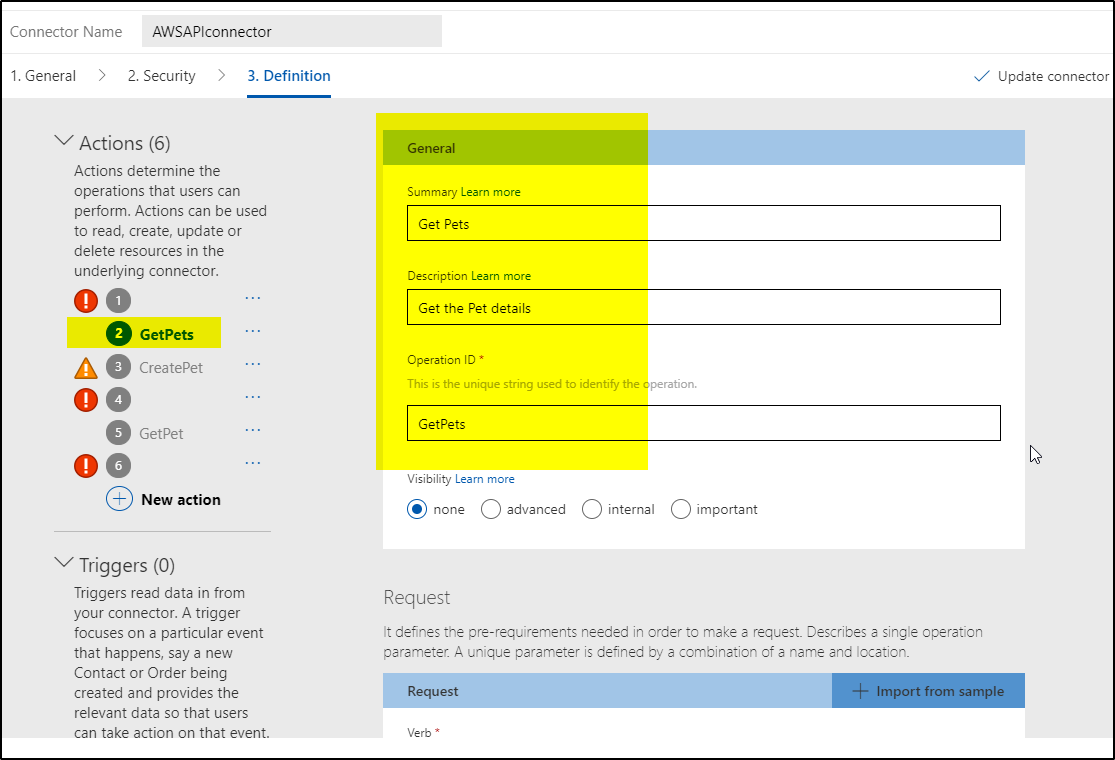
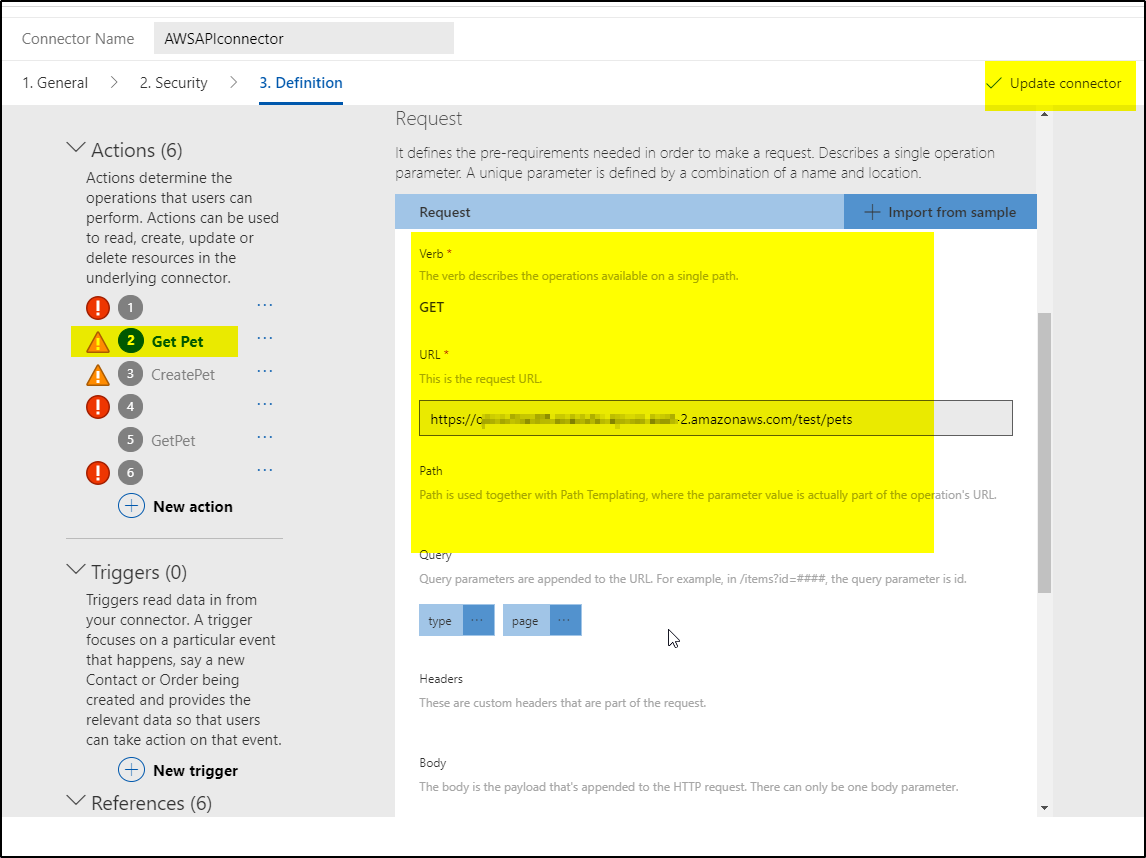
>>Click Definition, select each action under Actions and provide the Details. I have shown for one. Remove the actions which you don’t need to access. Once done, click Update Connector to save it.
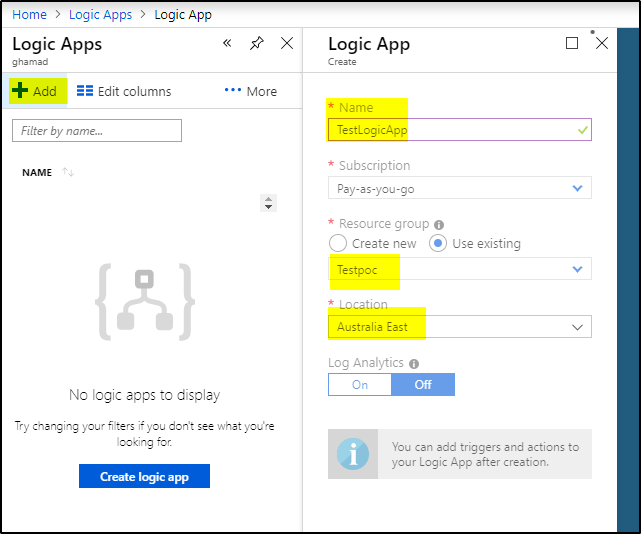
>>Now we will create Logic App and access this API endpoint using the custom connector. Select Logic App and click Add, provide Name, Subscription, Resource group and Location then click Create
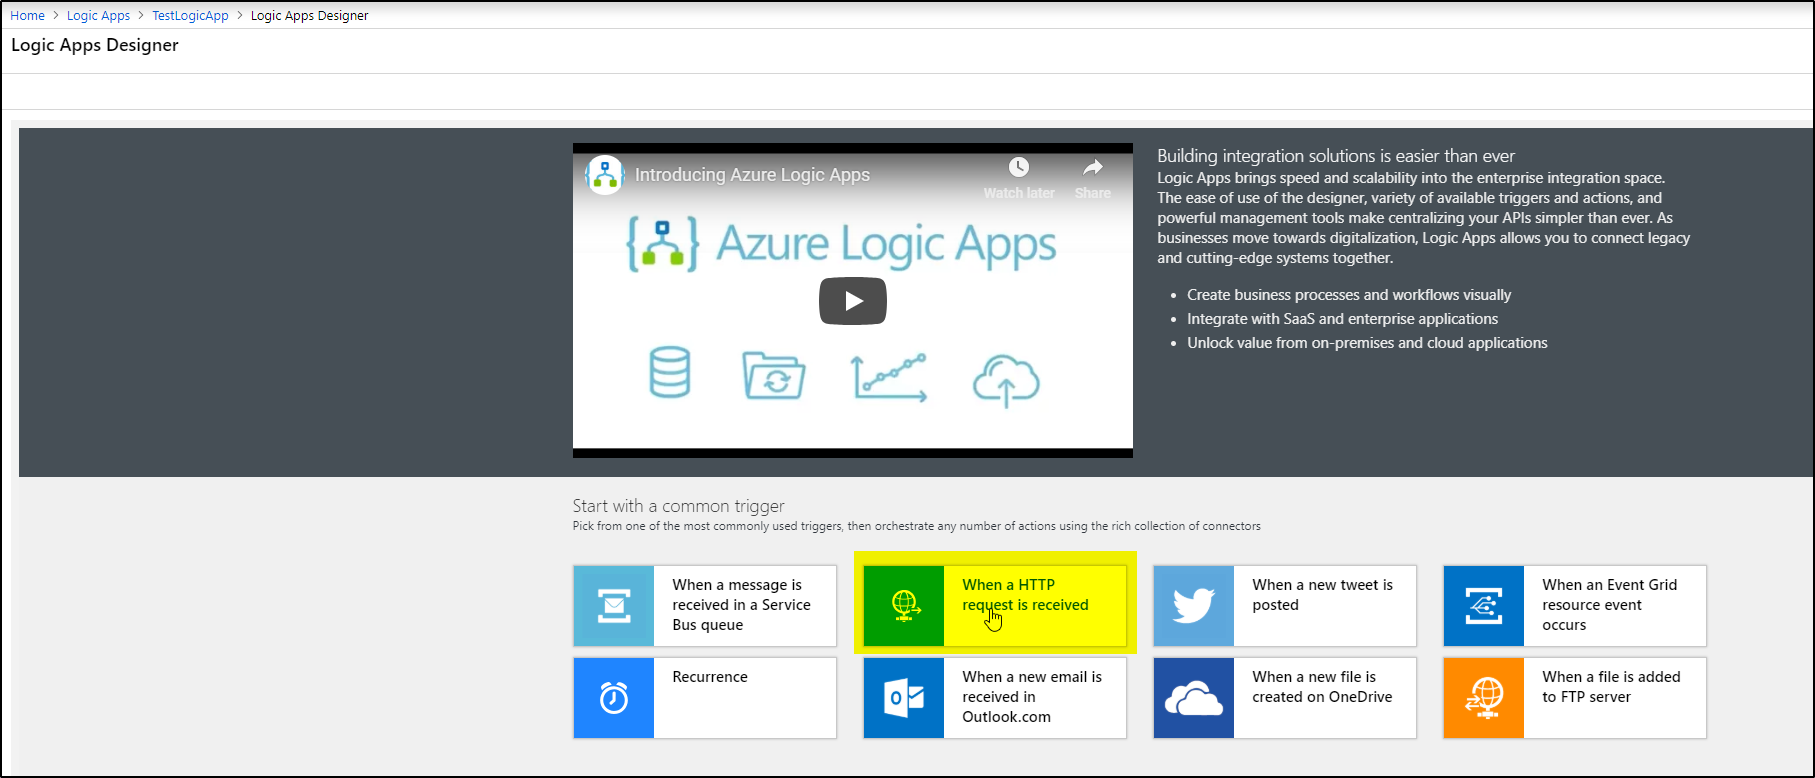
>>Select the newly created Logic App and select a trigger “When a HTTP request is received”
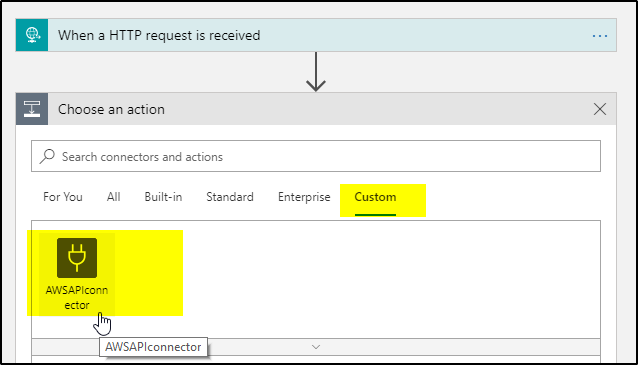
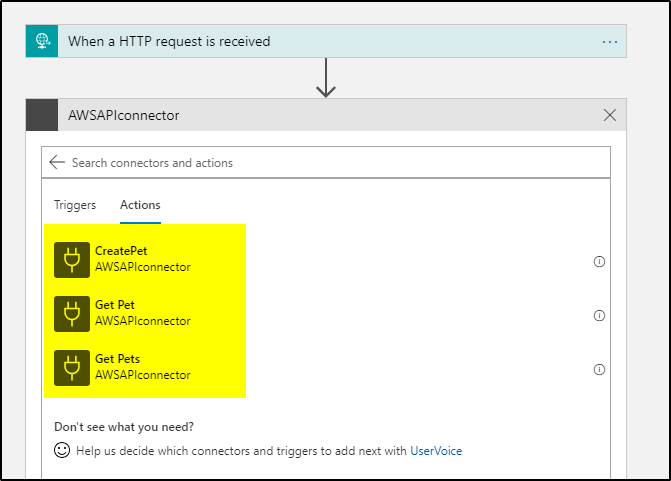
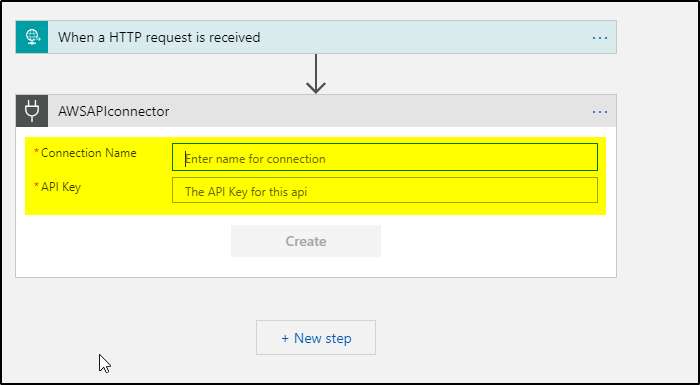
>>Click on + New Step, select custom and select the connector you created, select the Actions as Get Pets, it will ask for Connection Name and API Key value, after entering the values, click Create
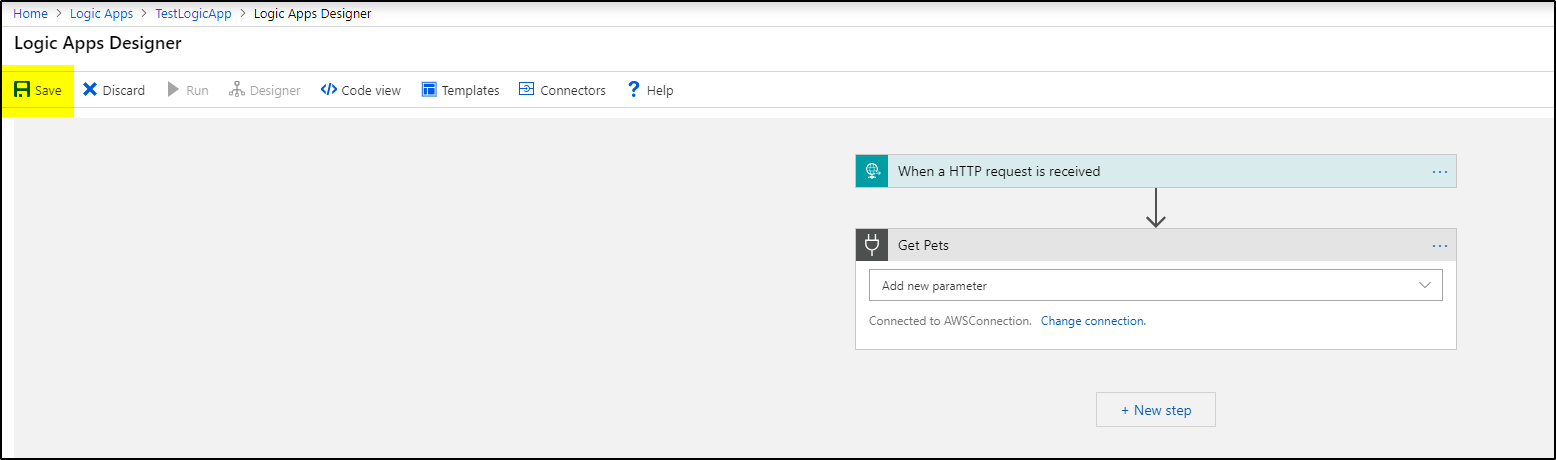
>>Save the App
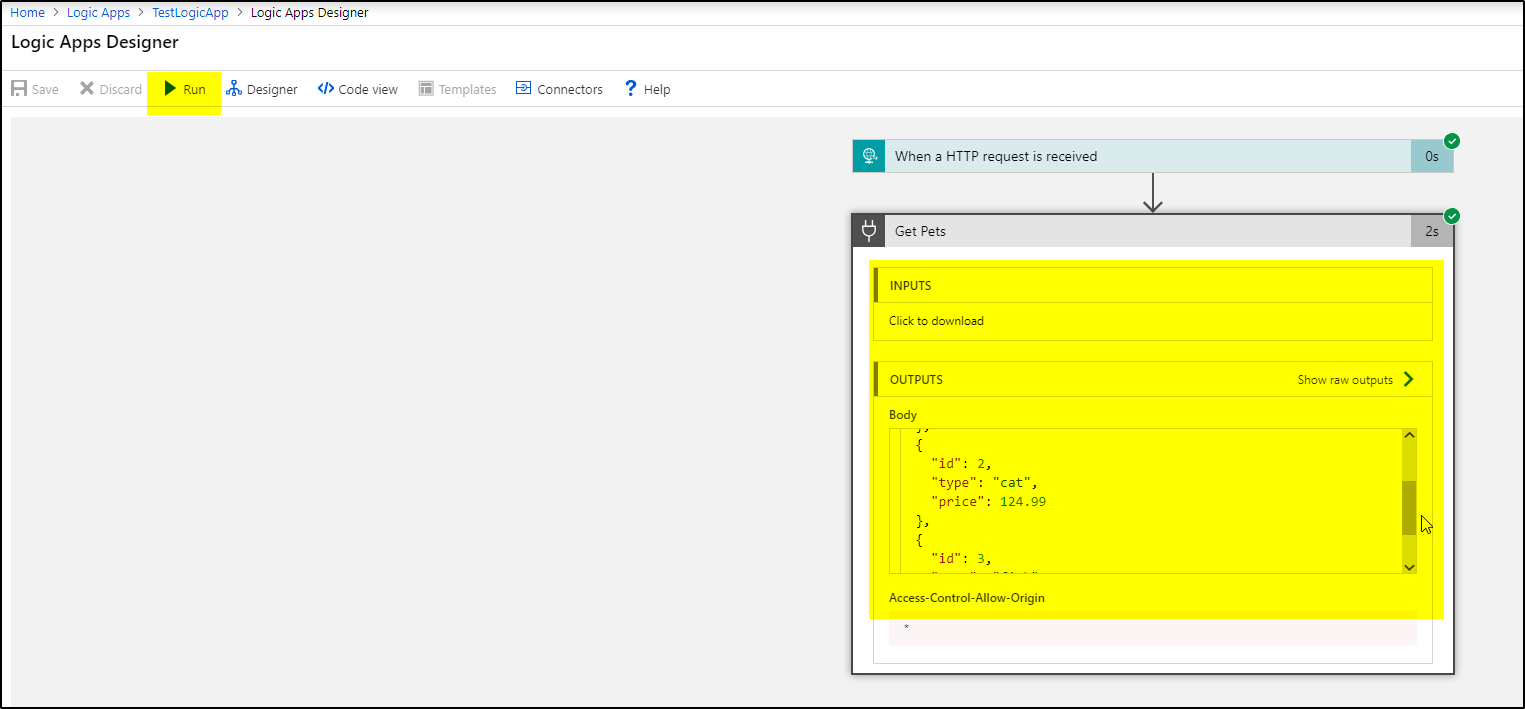
>>Run the Logic App to view the results of the AWS API endpoint-
NOTE: You can follow this link for more details about Usage Plans – https://aws.amazon.com/blogs/aws/new-usage-plans-for-amazon-api-gateway/