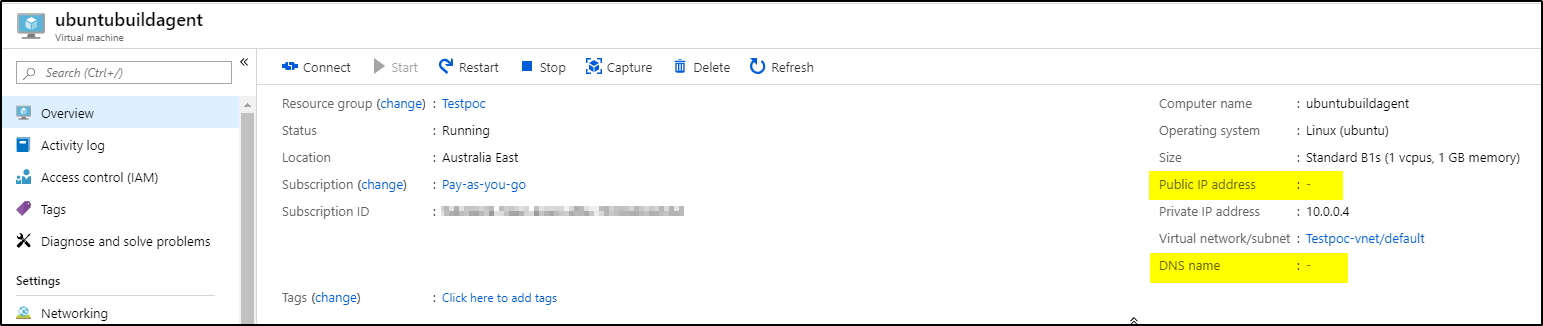
If your newly created Azure VM is missing Public IP address (DNS name) as shown below then follow the steps to attach public IP to this VM-
Solution:
>>Login to azure portal
>>In “All Services”, search for “Public IP addresses” and Add new IP Address resource by providing IP address resource name, DNS name and the resource group. Then click Create.


>> Once the Public IP resource is created, it will look like this

>>Now select the virtual machine, click on Networking and then click on Network interface

>>Click on IP Configurations and then the ipconfig1

>>Under Public IP address settings, click Enabled and then select the IP address resource created earlier and then Save

>> The virtual machine will have now Public IP address and DNS name as show below-
