Create Custom Authorizer
You can download sample custom authorizer from here. Afterwards, you’ll need to customize the files so that the custom authorizer works for your environment.
1. Unzip the folder containing the sample files you downloaded above to the location of your choice, and navigate to the folder using the command line.
2. Within the sample folder, run npm install to install the Node.js packages required for deployment; AWS requires that these files be included in the bundle you will upload to AWS during a later step.
3. Configure your local environment with a .env file. You can copy the .env.sample file (while simultaneously renaming it .env) using cp .env.sample .env. Make the following changes:
JWKS_URI=<replace the URL here>
AUDIENCE=<App ID URI of the Service principal created in AAD>
TOKEN_ISSUER=<token issuer url here>
Use the below link to get values of JWKS_URI and TOKEN_ISSUER for your azure tenantid-
https://login.microsoftonline.com/<your azure tenantid here>/.well-known/openid-configuration
4. Test the custom authorizer locally.
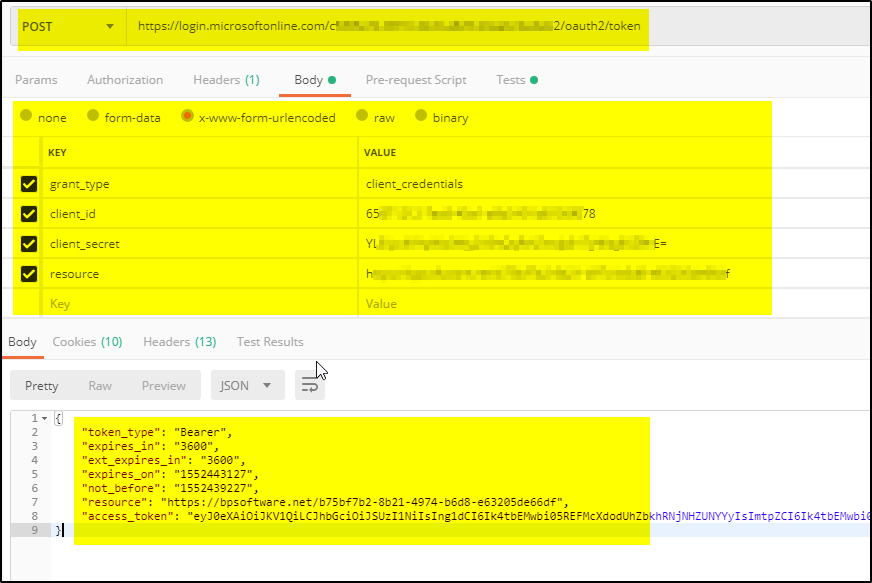
a. First, obtain a valid JWT Access Token. Use the below POST method and pass the parameters in BODY to get the JWT token (using POSTMAN)-
POST https://login.microsoftonline.com/<replace your azure tenantid here>/oauth2/token
BODY parameter:
grant_type:client_credentials
client_id:<Service principal Client id created in AAD>
client_secret:<replace athentication key value here>
resource:<APP ID URI of the Service Principal>
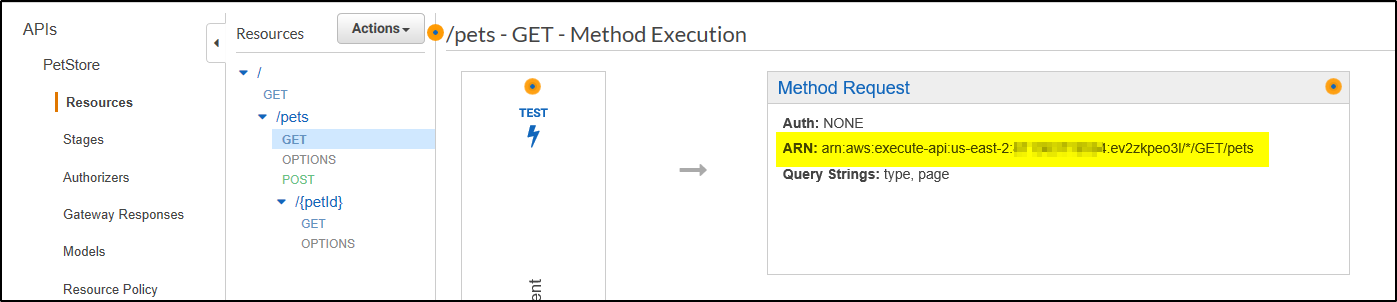
b. Create a local event.json file containing the token. You can copy the sample file (run cp event.json.sample event.json). Replace ACCESS_TOKEN with your JWT token, and methodArn with the appropriate ARN value for the GETmethod of your API.
To get the methodArn:
- Using the API Gateway Console, open the PetStore API.
- Click Resources in the left-hand navigation panel.
- In the middle Resources panel, expand the resource tree. Underneath
/pets, click GET. - In the Method Request box, you’ll see the ARN.
c. Run the test using npm test. The test uses the lambda-local package to test the custom authorizer using your token. If the test was successful, you’ll see output similar to the following:

If the value of Effect is Allow, your authorizer would’ve allowed the call to API Gateway.
Create the IAM Role
The IAM role has the required permissions to call Lambda functions; before we can proceed with our custom authorizer, we’ll need to create an IAM role that can call our custom authorizer whenever API Gateway receives a request for access.
1. Log in to AWS and navigate to the IAM Console. Click Roles in the left-hand navigation bar.
2. Click Create new role.

3. Under AWS Service Role, find the AWS Lambda row and click the associated Select button.

4. On the Attach Policy screen, select the AWSLambdaRole. You can use the provided filter to narrow down the list of options. Click Next Step to proceed.

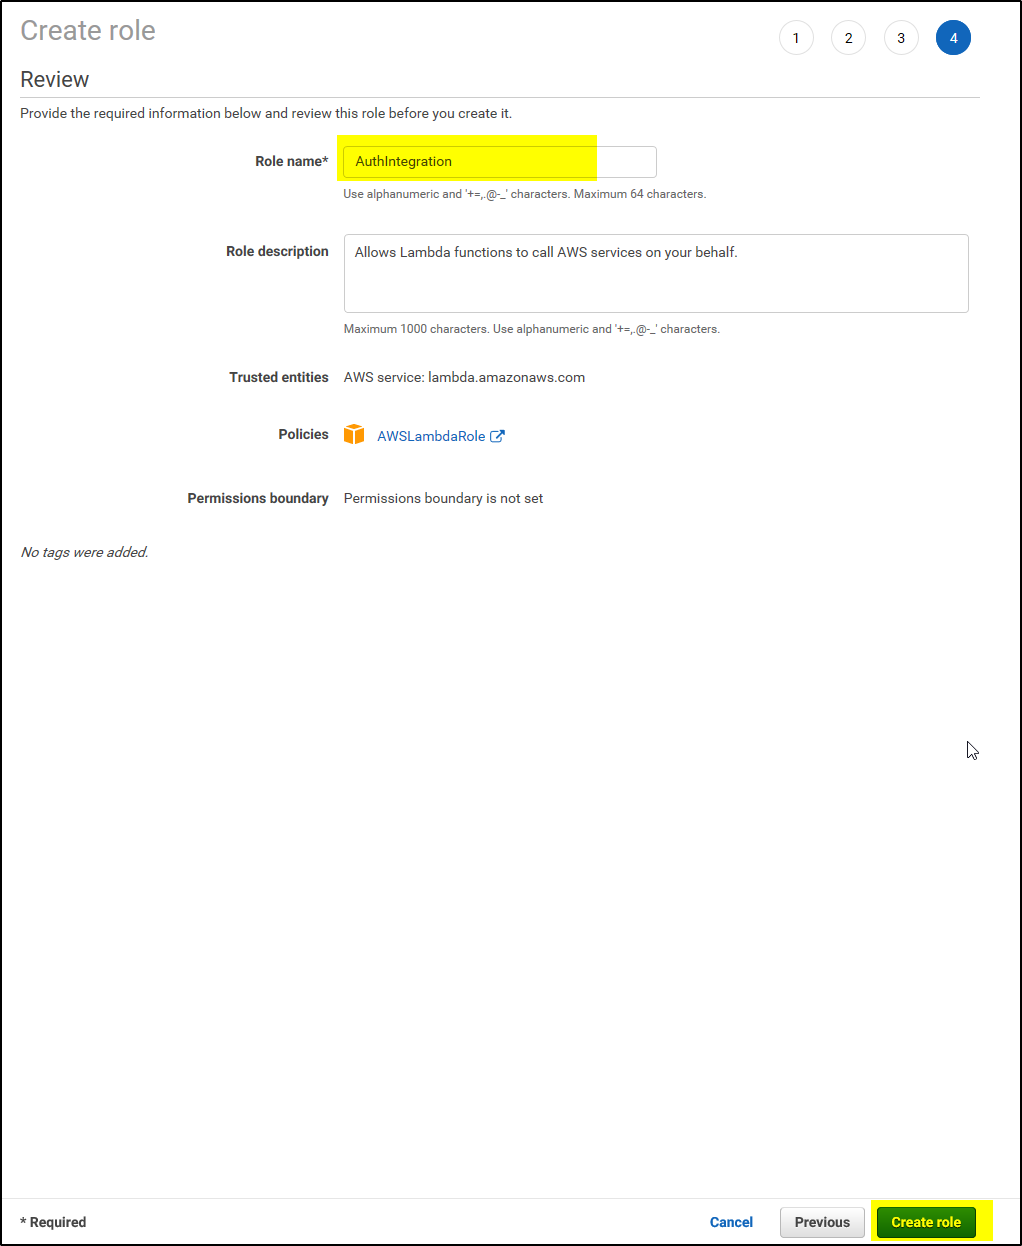
5. On Set role name and review, provide a Role name, such as AuthIntegration. Leave the rest of the fields as is. Click Create role.
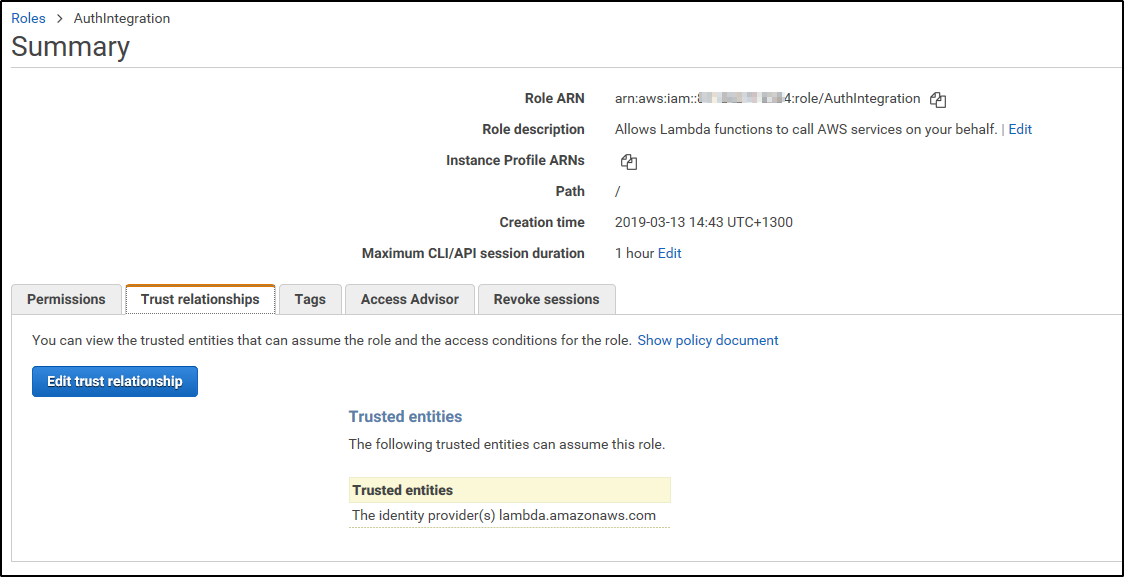
6. Once AWS has created your role, you’ll be directed back to the Roles page of IAM. Select your new role.

7. On the Summary page for the role you’ve just created, click on to the Trust relationships tab.
8. Click Edit trust relationship, and populate the Policy Document field with the following JSON snippet and click Update Trust Policy:
 9. You’ll be redirected back to the Summary page. Copy down the Role ARN value for later use.

Create the Lambda Function and Deploy the Custom Authorizer
Now that you’ve configured your custom authorizer for your environment and tested it to see it works, you’ll deploy it to AWS.
1. First, you’ll need to create bundle (zip file) containing the source, configuration, and node modules required by AWS Lambda.
2. Navigate to the Lambda console, and click Create function. click Author from scratch to create a blank function.
 3. Provide function name, existing role and click Create Function as shown below-

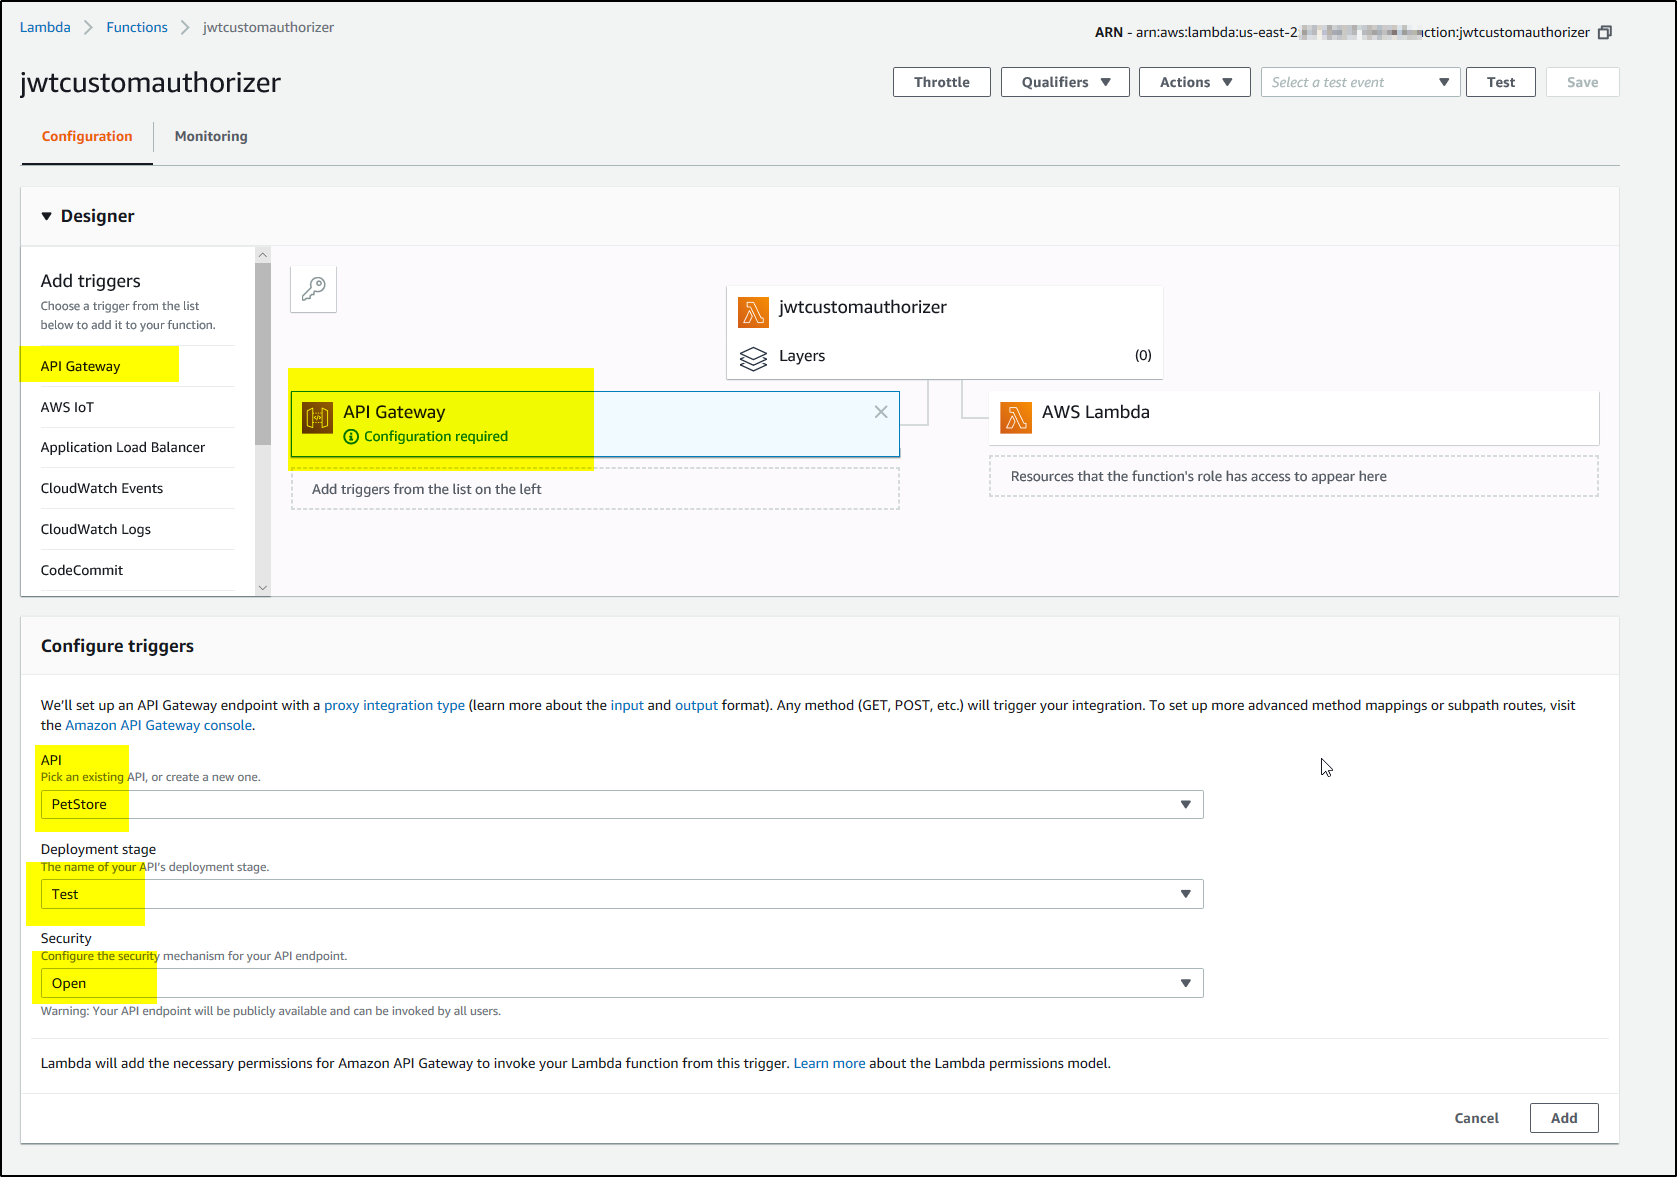
4. Add ‘API Gateway as trigger from the list and select the API, and deployment stage and click Add and then SAVE as shown-
5. Now click on the function name and upload the zip file containing all the files and click Save –

6. Now create the environment variables and add values and Save as shown-

7. Test the Lambda function you just created. Click Test in the top right corner. Copy the contents of your event.json file into the Input test event JSON (you can use the default “Hello World” template).

8. Click Save and test. If the test was successful, you’ll see the following.

Return to API Gateway Console.
 Open the PetStore API we created earlier.

Using the left-hand navigation bar, open Authorizers. If this is the first authorizer you’ve created, you’ll see the New custom authorizer configuration screen by default. Click on it. Provide the Name, Lambda function name, Role ARN, token source and Token Validation, TTL and Create as shown-

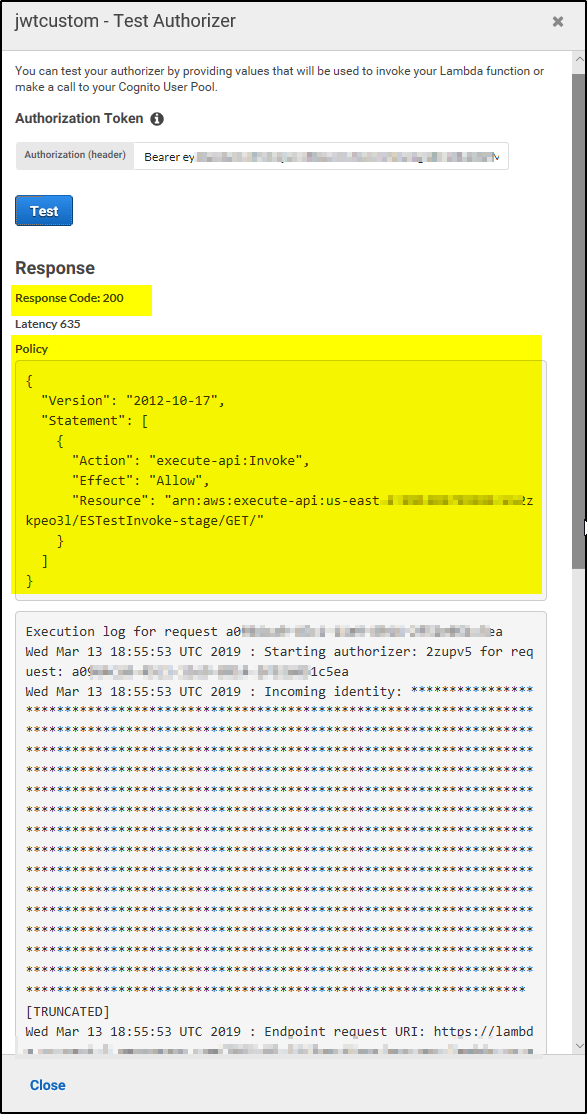
After AWS creates the authorizer and the page refreshes, you’ll see a new Test your authorizer section at the bottom of the screen. You can test your authorizer by providing the Auth0 token (Bearer ey...) you’ve previously used and clicking Test.

If the test was successful, you’ll see a response similar to the following.
In the next part of the tutorial, we will use the custom authorizer we created. Secure the API Using Custom Authorizers.