If your Azure Stack uses Azure AD as the identity store, you can create a service principal using the same steps as in Azure, using the Azure portal.
Create Service Principal
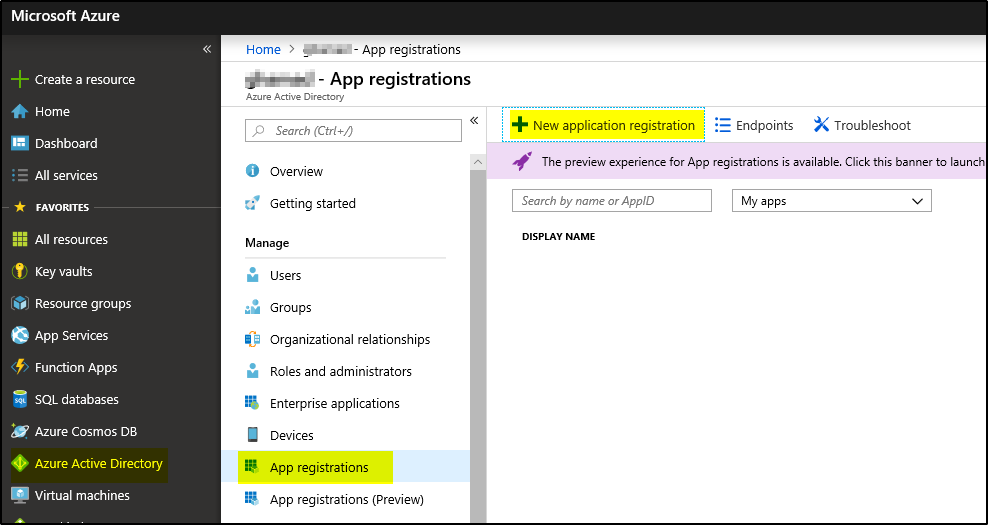
To create a service principal for your application:
1. Sign in to your Azure Account through the Azure portal.
2. Select Azure Active Directory > App registrations > + New application registration.
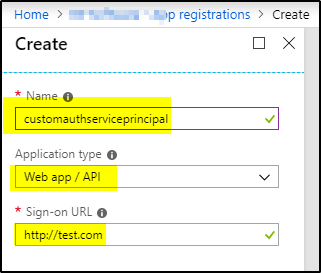
3. Provide a name and URL for the application. Select either Web app / API for the type of application. After setting the values, select Create.
Get Client Id, Client Secret and Resource
To use this Service Principal you would the Client ID and Authentication Key
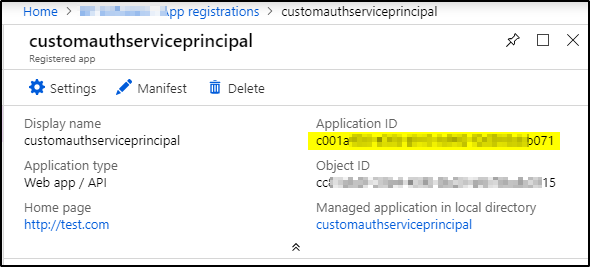
1. From App registrations in Azure Active Directory, select your application.
2. Copy the Application ID and store it. The applications in the sample applications use Client_id when referring to the Application ID.
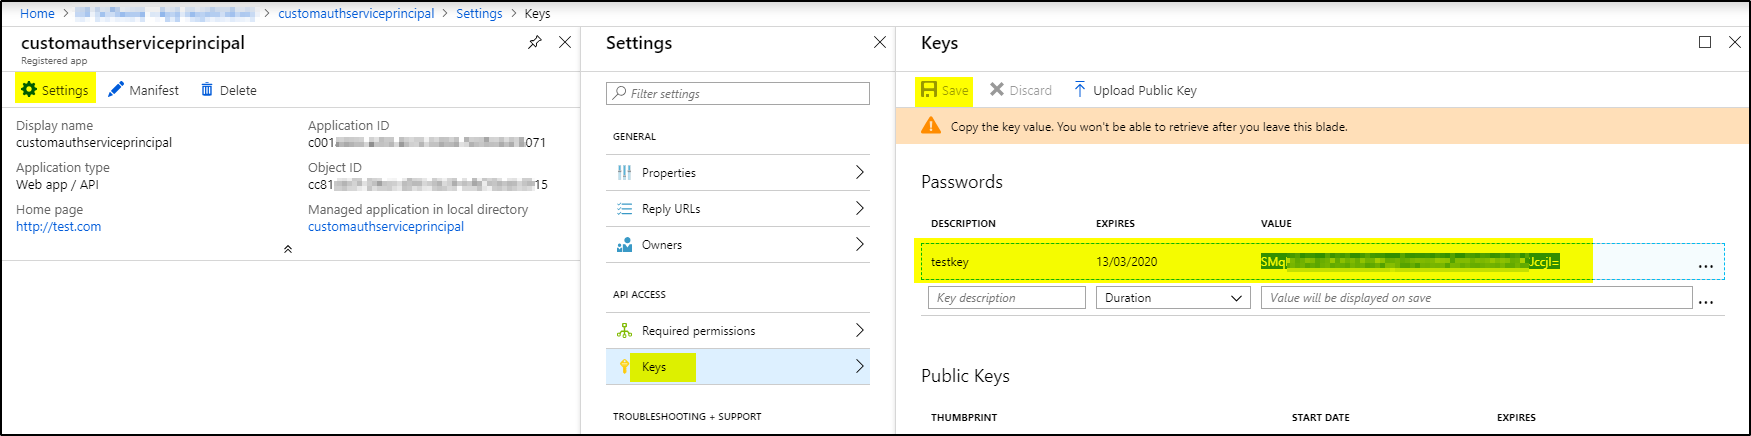
 3. To generate an authentication key, select Settings –> Keys.
4. Provide a description of the key, and a duration for the key. When done, select Save. The Key value will be used as Client_Secret later on.
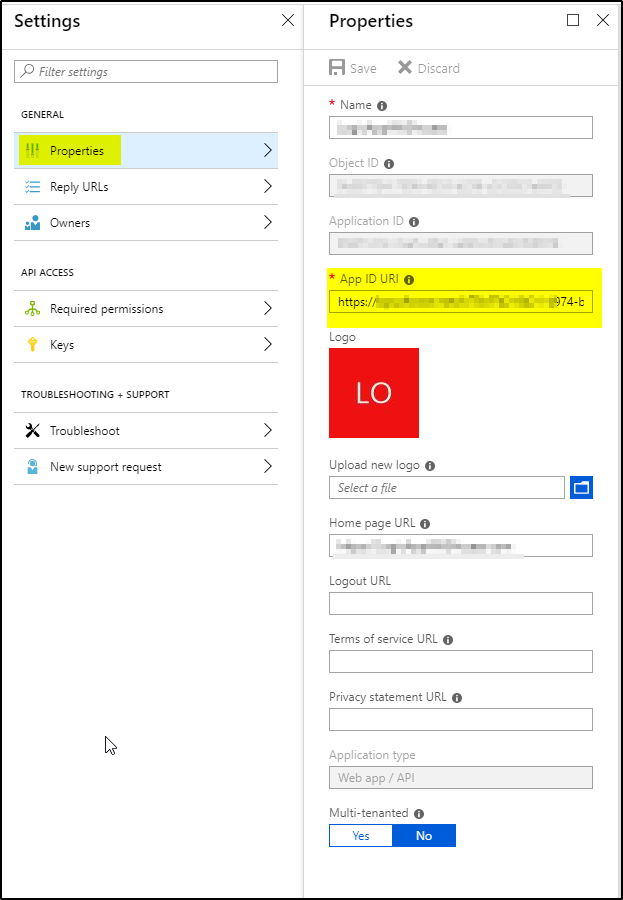
5. Click on properties –> Copy App ID URI. This value will be used as Resource later.
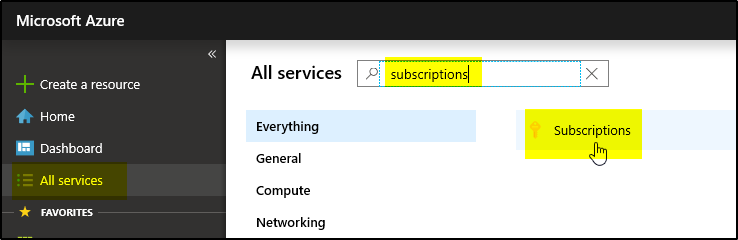
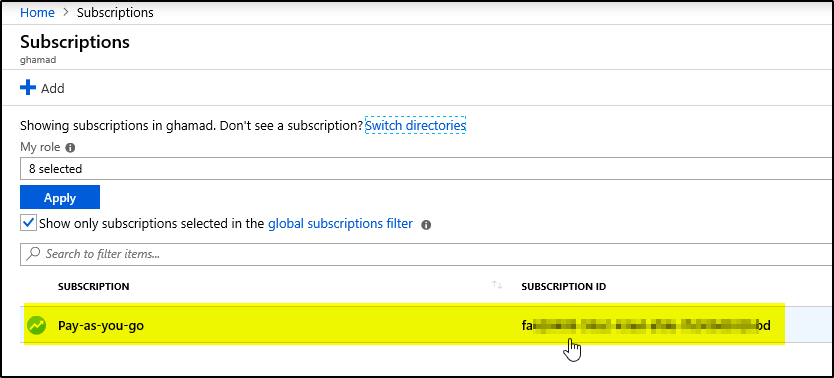
6. Now navigate to the level of scope you wish to assign the application to. For example, to assign a role at the subscription scope, select All services and Subscriptions. Select the particular subscription to assign the application to.
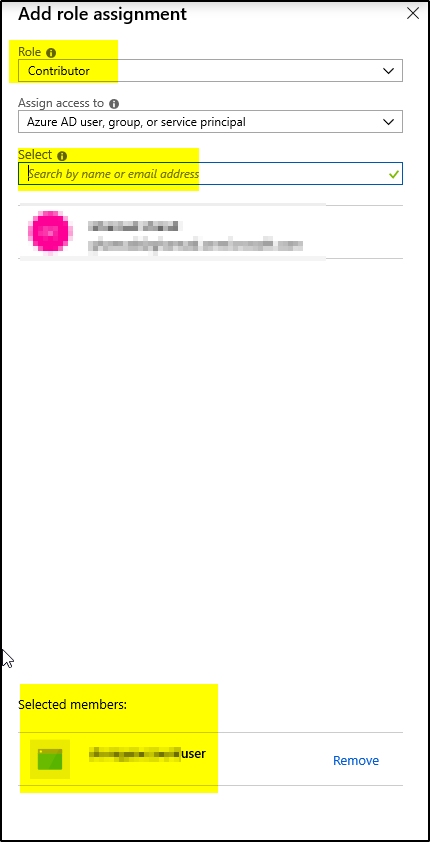
7. Now click on “Access control (IAM)” –> “Role assignments” –> + Add –> Select “Add Role Assignment”

8. Select required Role from drop-down and then search the service principal name in Select field and click on the service principal name to add to “Selected Members” below, then click Save
Step 2 – Import and Deploy the AWS API Gateway API