You need an build agent to run the build or deployment jobs in Azure VSTS DevOps. There are different ways to get this build agent-
>>Microsoft provides hosted and managed agents for Linux, Mac and Windows
>>You can create your own private build agent on VM or local on premises machine.
>>You can run the build agent in Docker Container on a private VM or on premises machine.
How to Run Private Build Agents in Docker Container on Ubuntu:
>> Microsoft provides VSTS agent image which can be run as Docker Container on Ubuntu. Get this image from https://hub.docker.com/_/microsoft-azure-pipelines-vsts-agent
My project needed Node.js, dotnet SDK 2.2, powershell, cURL, docker and docker-compose to build my project. So I have created new image using the VSTS agent image by installing these packages/dependencies on it.
Login to Ubuntu machine and create a Dockerfile and add the contents to it as found here.
Run docker command to build the image
$docker build -t <image_name> .
To see the created image, run command
$ docker images
>>Once image is created, either upload to docker registry or to azure container registry. In this example, I will upload it to azure container registry.
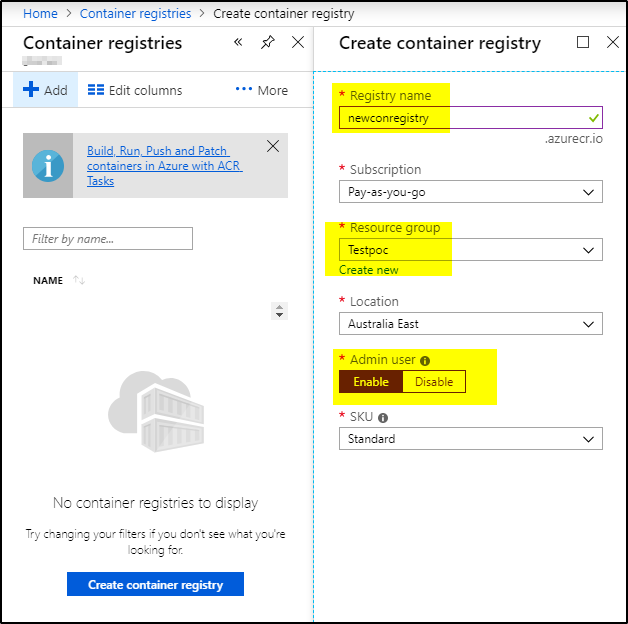
Login to azure portal and create a container registry. Note the Login Server, User and password-
Now run the below commands from ubuntu machine prompt to upload the image to azure container registry
$ docker tag <image_name> <login server name>/<name of build image to upload>
$ docker login <login server name> -u <username> -p <password>
$ docker push <image_name>/<build image name>
Example:
$ docker tag test newconregistry.azurecr.io/buildagent
$ docker login newconregistry.azurecr.io -u newconregistry -p NTN9S0vfDfD4k=d5D8LNXGCd3D5R7mf63
$ docker push newconregistry.azurecr.io/buildagent
Now we are ready to start the VSTS agent in container using this image.
>>Create a private agent pool:
Login to dev.azure.com/<your_project_name>/.
Go to Project settings–>Pipelines–>Agent Pools, Add New agent pool
Create PAT (personal access token)
>> Start the VSTS build agent in container using the below command-
$ docker run -e VSTS_ACCOUNT=<vsts account name> -e VSTS_TOKEN=<PAT token created> -e VSTS_AGENT=’$(hostname)-agent’ -e VSTS_POOL=<agent Pool name> -e VSTS_WORK=’/var/vsts/$VSTS_AGENT’ -v /var/run/docker.sock:/var/run/docker.sock –name=buildagent -it <azure container registry servername>/<image name>
Example:
docker run -e VSTS_ACCOUNT=ghamad -e VSTS_TOKEN=<PAT token created> -e VSTS_AGENT=’$(hostname)-agent’ -e VSTS_POOL=ContainerPool -e VSTS_WORK=’/var/vsts/$VSTS_AGENT’ -v /var/run/docker.sock:/var/run/docker.sock –name=buildagent -it newconregistry.azurecr.io/buildagent
Once the build agent is started in the container, it will show up agent pools as registered. Point your pipelines to this agent pool to build your project.


