The ARM template provided here will create a Microsoft Visual Studio based VM with VNet, Network Interface, Public IP and then then installs the Visual Studio Team Services build agent. There are few templates available at https://github.com/Azure/azure-quickstart-templates.
But I faced issues running them directly. After debugging it I have made the change to fix it. I believe this template now should work without issues for anyone. If required you can make further changes.
Pre-requisite:
>>You have a VSTS account
>>Create Personal Access Token (PAT) and keep it handy. Follow this link for the steps to create one.
>>Decide on VM name, VM size, VM admin user name and password, Build agent Pool name, Build agent name, Virtual Network name, CIDR for VNet, IP range for Subnet, Subnet name, Resource group name.
>>Storage account to store the InstallVSTSagent.ps1 file.
Steps to create VM with VSTS build agent on Windows using ARM template in VS 2017 :
>>Download the files from github and unzip the files.
>>Login to azure portal and create blob storage account. Follow this link.
>>Upload the InstallVSTSAgent.ps1 file to blob storage account and get the access URL (make sure access level is Container) [You can place this file on github as well]
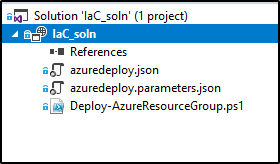
>>Now open the IaC_Soln in Visual Studio 2017
>>Open azuredeploy.parameters.json file and update the parameter values for your environment
>> Open azuredeploy.json file and search for ‘fileUris’, replace the URL with your storage account URI.
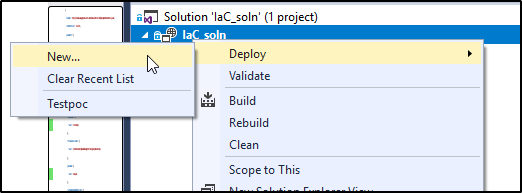
>> Save and build the solution. Right click on solution and click Deploy
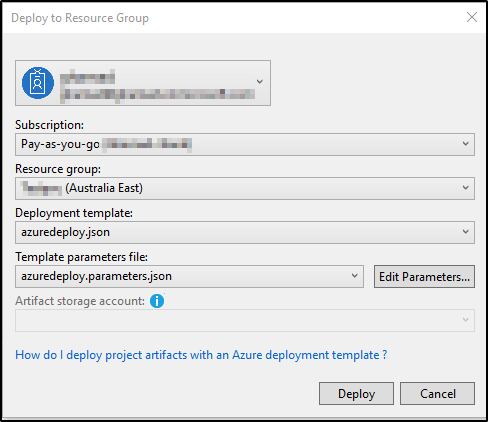
>>Make sure you are logged into right account, select subscription, resource group, deployment template and template parameter file
>>Click Deploy..It will start the deployment and complete it. You can check in your agent at the end that the agent is registered and available.


