Scenario:
You have registered and bought your domain (mywebsite.co.uk) from Google. But you want to host a static website in AWS S3. You are not sure how to host and connect your website in AWS S3 to your Domain in Google. This article will provide steps to achieve this.
Steps:
1. Buy & register your Domain name with Google: You can buy domain name from Google Domains. You can follow this to buy the domain.
2. Create an AWS account to access S3: Follow this link to create AWS account.
3. Upload your website files to AWS S3: You can use Amazon S3 to host a static website. On a static website, individual webpages include static content. They might also contain client-side scripts. Static websites deliver HTML, JavaScript, images, video and other files to your website visitors and contain no server-side application code, like PHP or ASP.NET. Static websites are very low cost, provide high-levels of reliability, require no server administration, and scale to handle enterprise-level traffic with no additional work. S3 offers tiered pricing related to usage and storage, so you only pay for what you use.
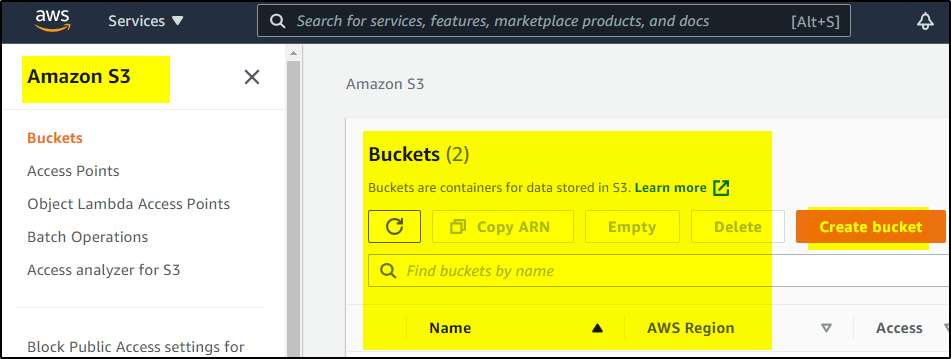
>>> Login to AWS account. Search S3 service and select the service as shown in screen shot. Click Create Bucket-
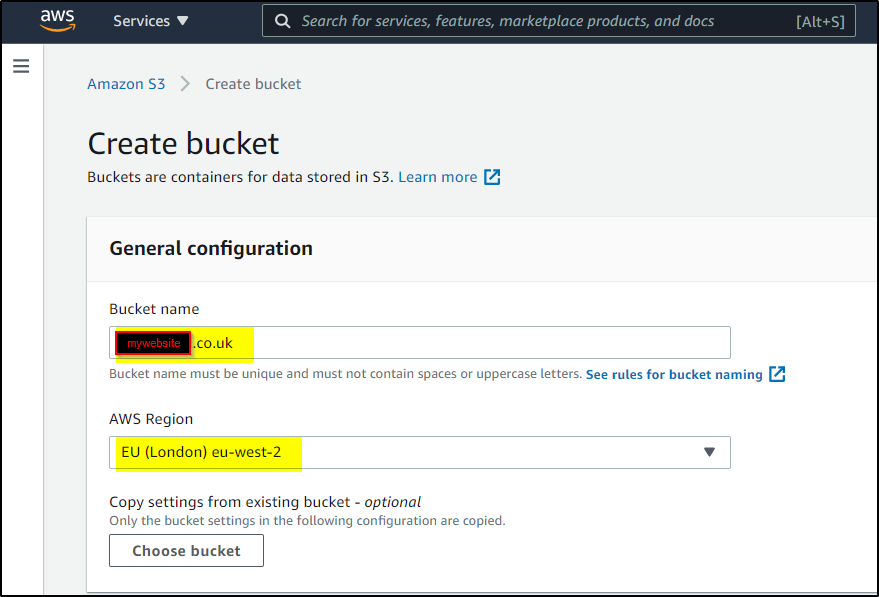
>>> Create a bucket with same name as your Domain name. [Note – the name of bucket must exactly match the Domain name]
>>> leave rest of settings as Default and click on Create Bucket–
>>> Follow the same steps as above and create another bucket – www.<yourDomainName>. Once both buckets are created, it will appear as shown-
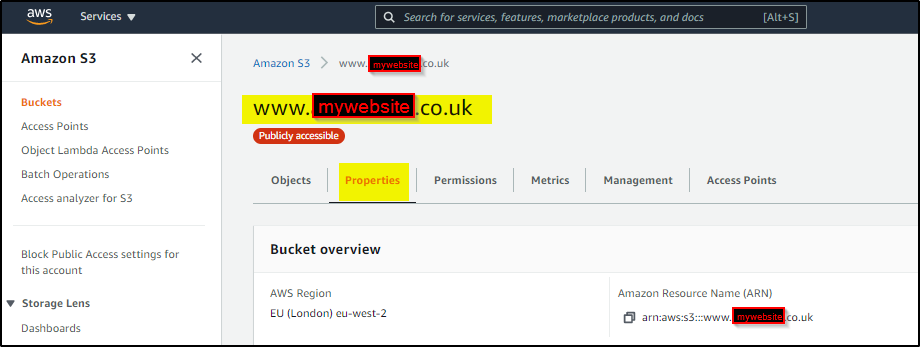
>>> Now click on first bucket (same as Domain Name), it will show as below. Upload your website files.
>>> Now click on Properties Tab–>scroll down to “Static website Hosting” and enable the options as shown highlighted in screenshot and Save Changes.
>>> Now click Permissions Tab –> scroll down to Bucket Policy and add this policy (replace your Domain name)
{
    "Version": "2012-10-17",
    "Statement": [
        {
            "Sid": "PublicReadGetObject",
            "Effect": "Allow",
            "Principal": "*",
            "Action": "s3:GetObject",
            "Resource": "arn:aws:s3:::<REPLACE-YOUR-DOMAIN-NAME>/*"
        }
    ]
}
>>> Now Select the other bucket with www.<domain-name> and make changes to Properties Tab and Permissions Tab as shown in Screen shot. Files will not be uploaded to this bucket. It is just to redirect to <Domain-Name> bucket in case some one tries to browse www.domain-name in browser.
Now we are all set with S3 bucket. The website files are all uploaded. Now we will see how the requests are redirected to S3 bucket.
4. Create hosted zone in AWS Route53: Search for Route53 service-
>>> Create public hosted zone with exactly same name as your Domain name-
>>> Once hosted zone is created, it will provide 4 Name-Servers and SOA record. We will add 2 more records as shown below-
Steps to add record, leave Name as empty, select alias, select the S3 endpoint in the region where the bucket is created-
Similarly create another record with www as Record Name (select the www… named S3 bucket)-
Finally Route53 will appear like below screenshot. Take a note of the 4 Name Servers. We have to update them in Google DNS.
5. Make changes in Google Domain to send all requests to your website:
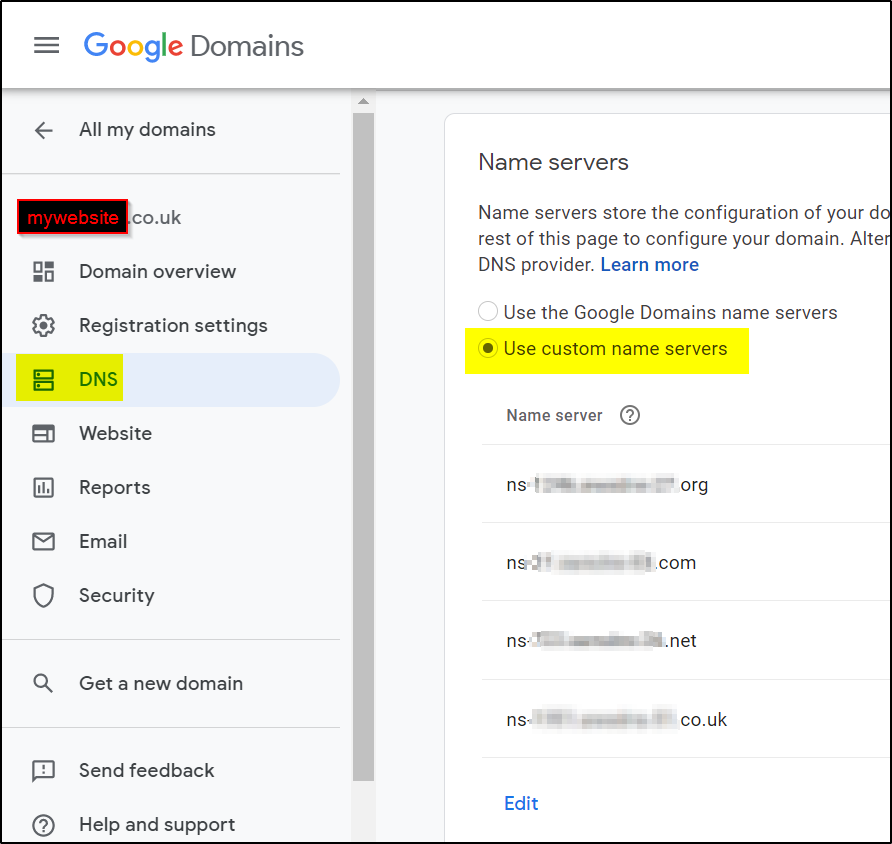
Log into Google Domains and click on “My domains” on the left hand sidebar. Click on the Manage link to the right of your domain name so the following page will appear:
>>>Add the 4 Name Servers which we noted from Route53 hosted zone. [Note: remove the dot (.) at end of the name]
Select “Use Custom Name Servers” instead of the default Google Domains.
A single text field will appear. Click on the “+” button 3 more times to get a total of 4 text fields.
Copy and paste each Name Server (NS) from the Route 53-Record Sets panel.
It will take some time to propagate the DNS change. Now, your site www.yourdomain-name and yourdomain-name (in example here it is acstechltd.co.uk) are set up to serve your website.
Reference:
https://docs.aws.amazon.com/AmazonS3/latest/userguide/HostingWebsiteOnS3Setup.html
https://docs.aws.amazon.com/Route53/latest/DeveloperGuide/dns-configuring.html
https://docs.aws.amazon.com/Route53/latest/DeveloperGuide/MigratingDNS.html


