Azure table storage service allows operations on table using REST APIs. You can query, insert, update and delete table entities. You can find step by step explanation on how to achieve this.
Create Table Storage:
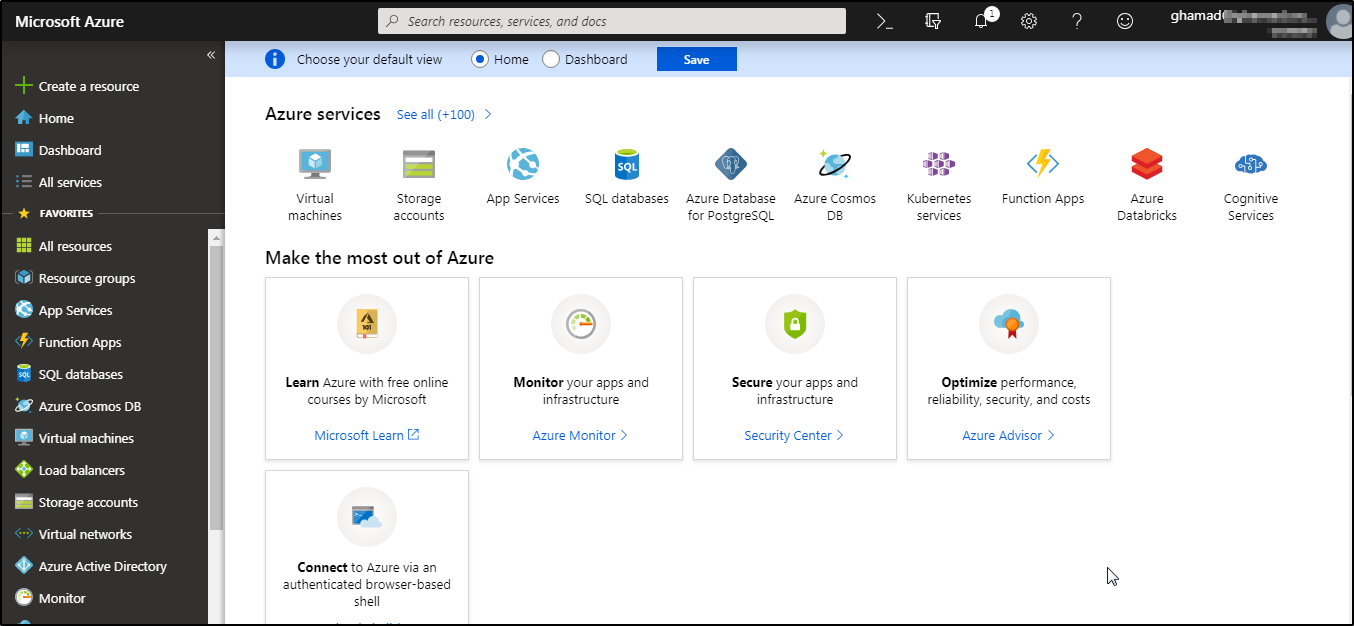
Login to portal to create table storage
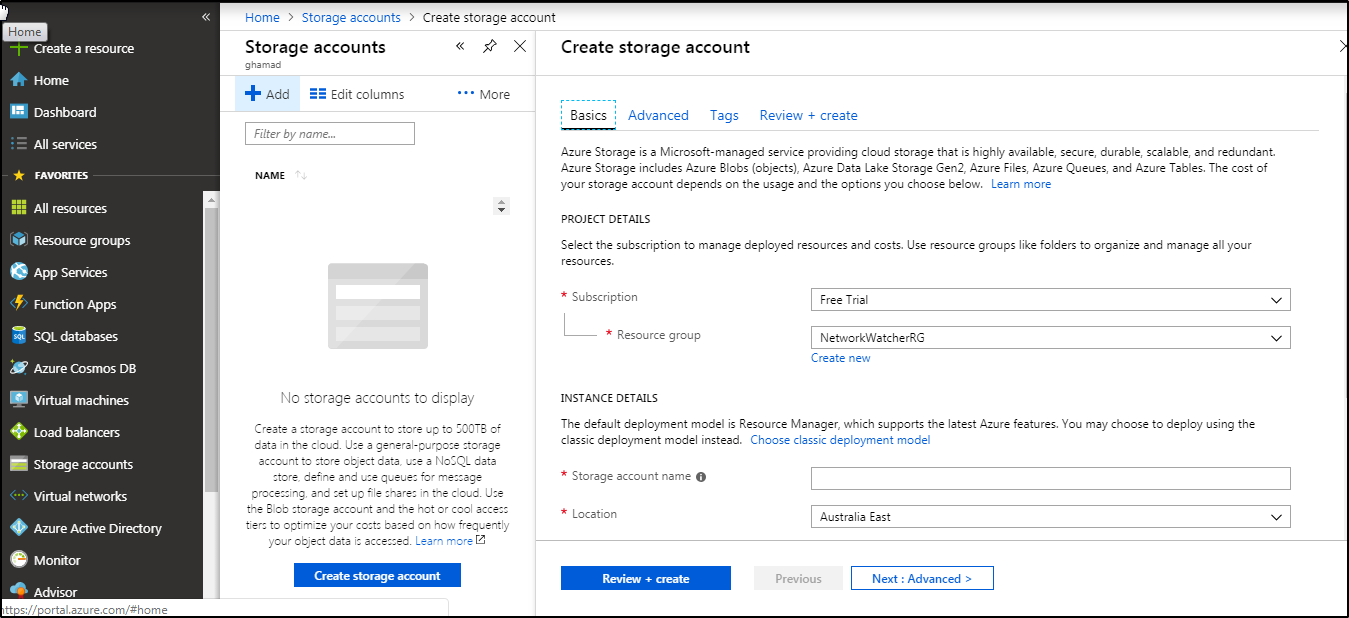
Click on Storage Accounts–>Add, enter the details
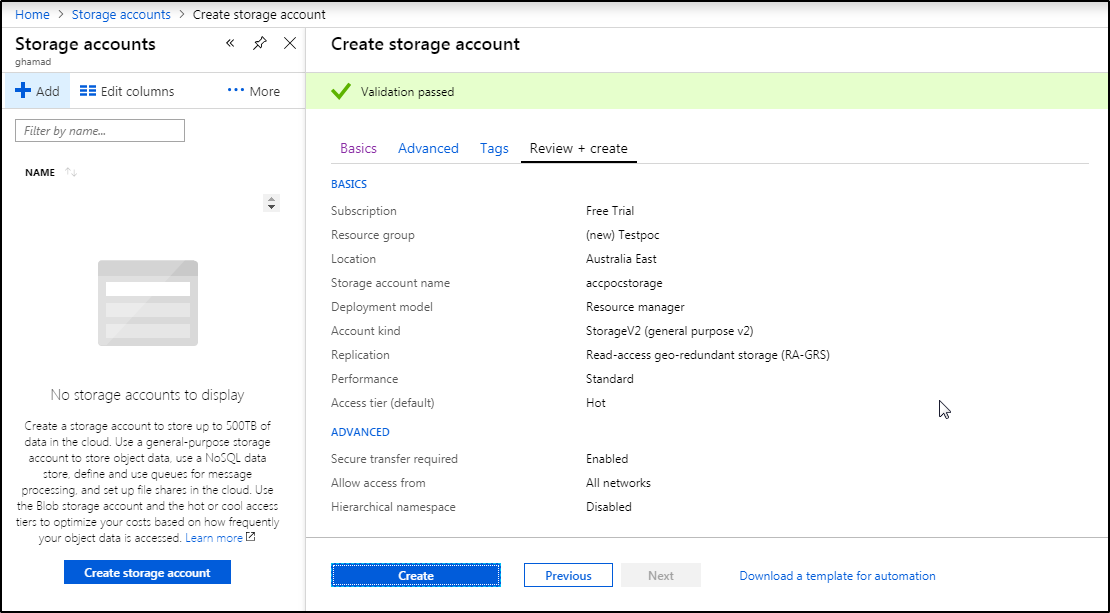
Provide storage account name (unique), resource group name, location and click Create.
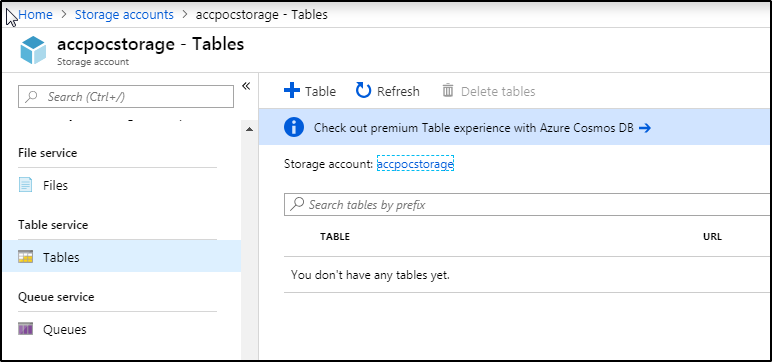
Once storage account is created, click on storage account “accpocstorage”

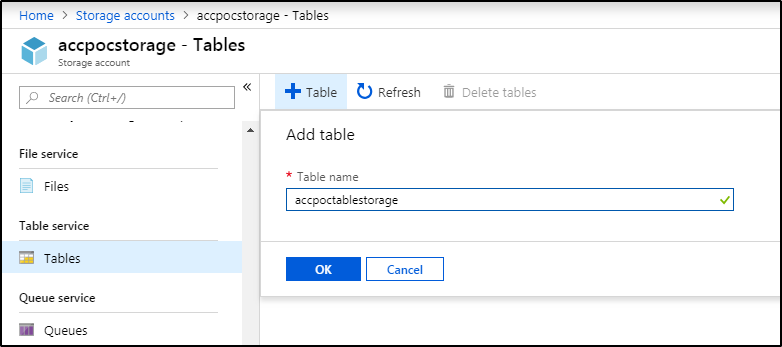
Scroll down and under Table service, click Tables–>+Table
Provide table storage name (unique) and click OK
After creating table storage, scroll up and click on “Shared Access Signature”. SAS is required to access the table storage from POSTMAN. You can read more on SAS here.
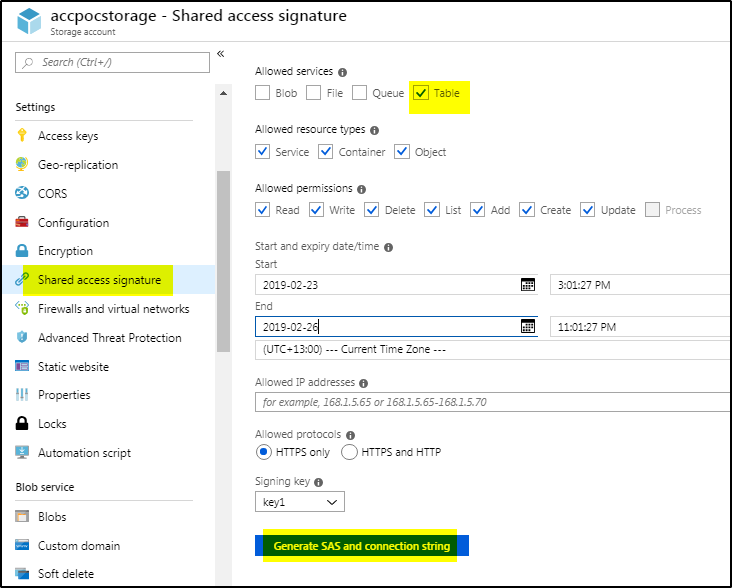
Note down the table service SAS URL

Now Open POSTMAN to use this REST API to access this table storage and perform the operations like GET (query),
POST(insert),PUT(update) and DELETE (delete) on table.
Create a Collection and add a request to it

Paste the SAS URL as shown above and save the GET request. When you click on Send, it will throw the below error 400.
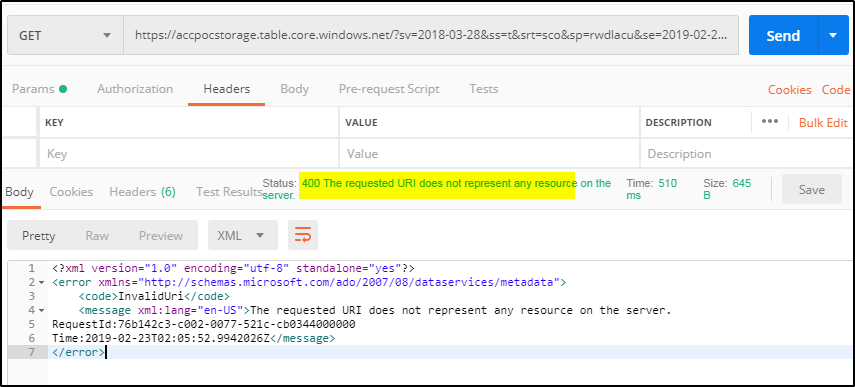
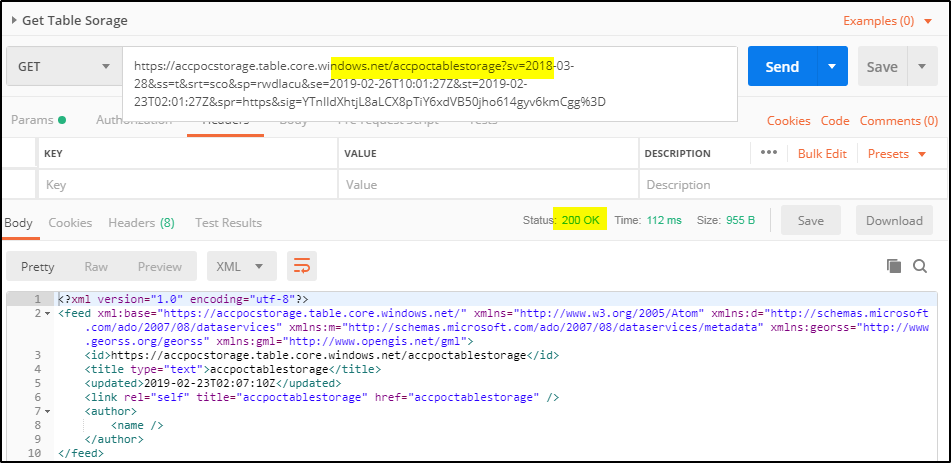
This error is due to the fact that the SAS URL does not have table storage included in it. So add the table storage name in the url and save it. Click Send again, this time it will show 200 OK return status.
Now you are able to query the table but it is not having any data to return in the GET query. Lets insert some data using POST statement. Copy the SAS URL with table name and add json data to be inserted into table. MAke changes as shown below-
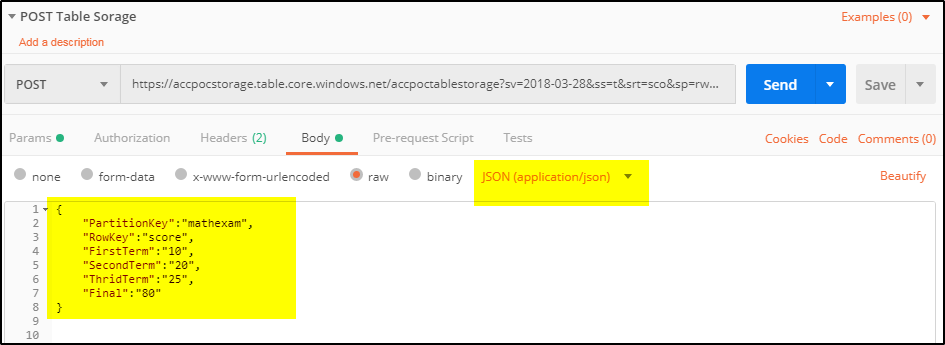
Click Send to insert this data in table. The return data will be as shown below
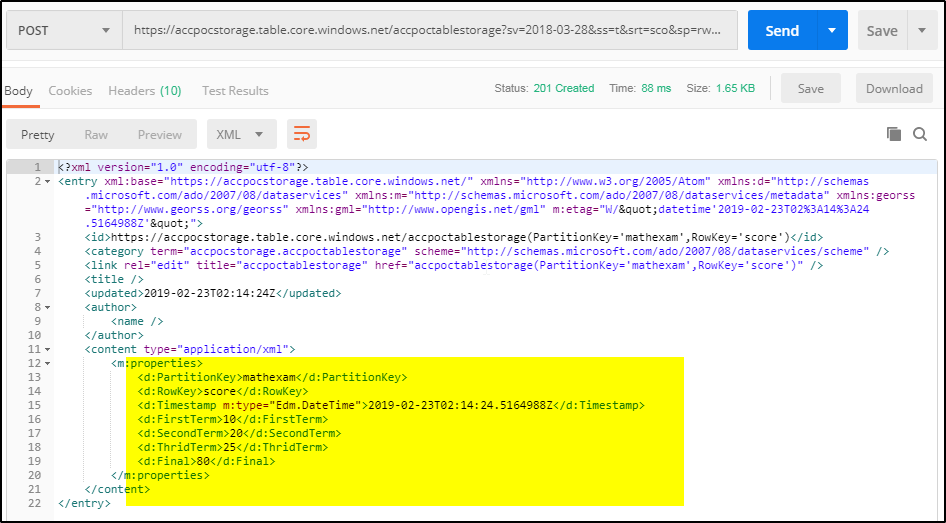
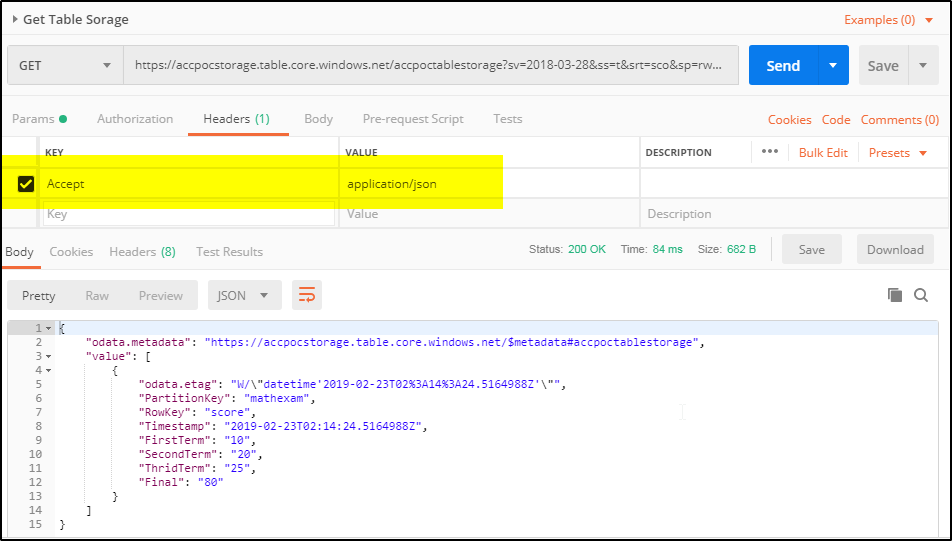
You can run the GET message again to query the data inserted using POST message. Make sure to add Headers in GET message to receive response in JSON format else it will show XML format.
Now we can update this data using PUT message statement. For that you can copy the URL returned in POST message as shown below. You have to pass the PartitionKey and RowKey to update specific entity in the table

Create PUT message and paste the URL as shown below. Add the data in Body to be update in JSON format

Click Send to update the entity, it will not return any data back but the status should show 204 No content

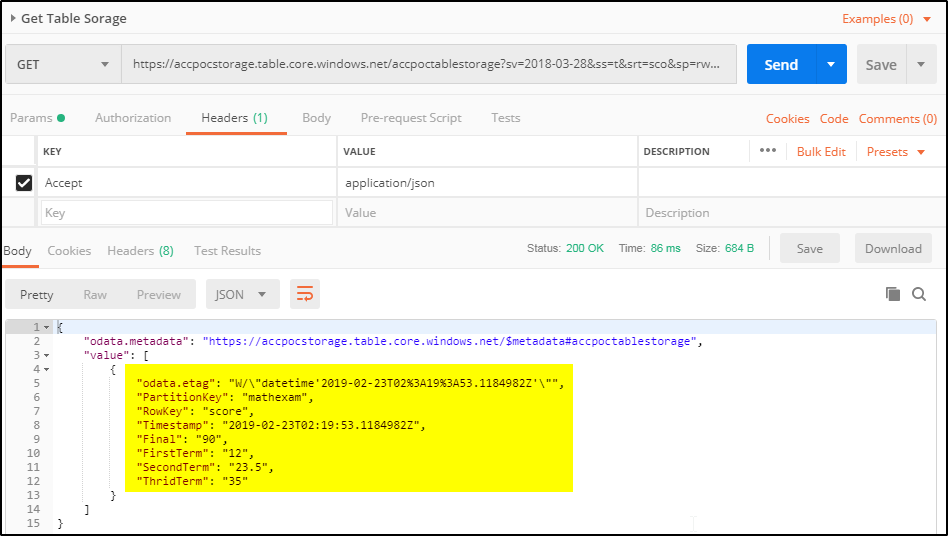
The data can be queries using GET message to confirm the entity property values are changed
Now we can use DELETE message to delete this entity in the table. You have to pass PartitionKey and RowKey to delete the entity as shown below

After clicking Send it will show status as “400 Bad request”.
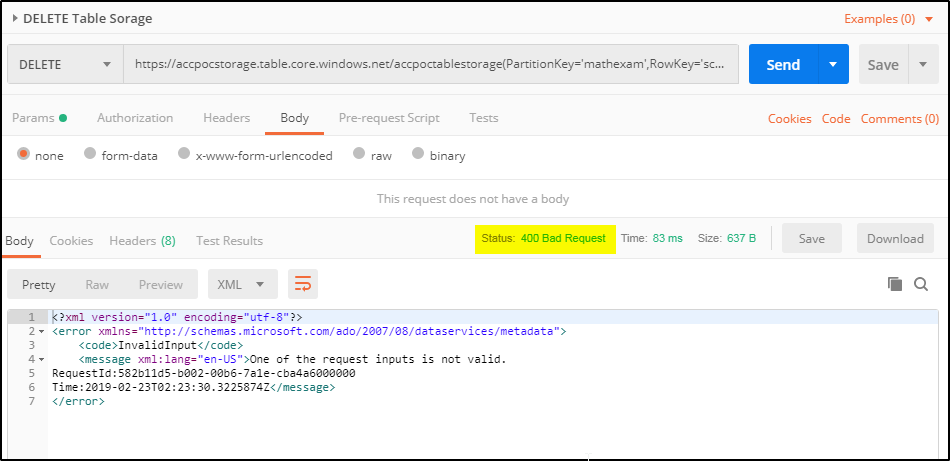
This happens because it requires a Header–>If-Match with value as ‘*’

Click Send again and you should receive the below message

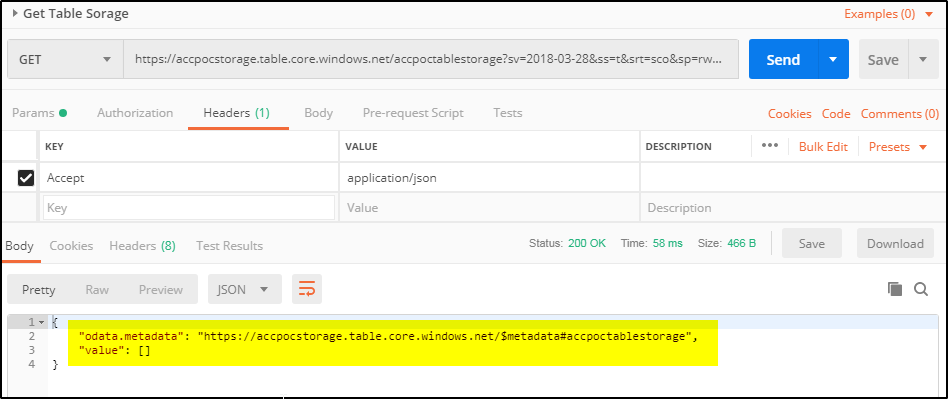
You can confirm that the entity is deleted using GET message
You can use global variable to pass the PartitionKey and RowKey values to PUT and DELETE messages.